![[IMAGE]](http://www.darrylsgarage.com/914/914side3.jpg)
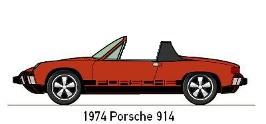
Darryl's 1974 Porsche 914
Project Page
Last Updated on November 2, 2024
Update 11/2/24 - PROJECT COMPLETE! The Engine Lid is Back on the Car! - I recruited my next door neighbors John and Braden Goldy to help me install the 914's engine lid today. This marks the finish line on this epic 3-year project. Now I can once again continue my 33 year love affair with this, my teenage dream car and first Porsche which still, after all these years makes my heart go pitter-pat just looking at it
![[IMAGE]](http://www.darrylsgarage.com/914/914done.jpg)
![[IMAGE]](http://www.darrylsgarage.com/914/914300mile8.jpg)
![[IMAGE]](http://www.darrylsgarage.com/914/914300mile4.jpg)
![[IMAGE]](http://www.darrylsgarage.com/914/914300mile5.jpg)
![[IMAGE]](http://www.darrylsgarage.com/914/914300mile6.jpg)
![[IMAGE]](http://www.darrylsgarage.com/914/914300mile7.jpg)
Update 11/1/24 - The 300 Miles Milestone - So now with the 300 mile valve adjustment complete and the heater system ductwork installed it's time to photograph the completed restoration and reassembly of the drivetrain, suspension and repainted underside of the car before installing the engine lid.
![[IMAGE]](http://www.darrylsgarage.com/914/914heater16.jpg)
![[IMAGE]](http://www.darrylsgarage.com/914/914300mile1.jpg)
![[IMAGE]](http://www.darrylsgarage.com/914/914300mile2.jpg)
![[IMAGE]](http://www.darrylsgarage.com/914/914300mile3.jpg)
Update 10/31/24 - The Heat is Installed! - I got the heater ductwork puzzle all figured out and completely installed today! There are some indexing marks on the identical pipes (that are flipped over depending on side) that connect the heat exchangers to the flapper boxes that line up on the seam of each flapper box. All the pieces were test assembled outside the car. This took hours carefully hand fitting by bending the leading edge of the pipes that inserted into the flapper boxes and over the freshly painted ducts but it made installing them in the car a piece of cake. So now the 300 mile valve adjustment is done and the heater installed and working, now it's time to put some miles on the engine and deal with any issues that arise but the project is pretty much done once I install the engine lid.
![[IMAGE]](http://www.darrylsgarage.com/914/914heater13.jpg)
![[IMAGE]](http://www.darrylsgarage.com/914/914heater14.jpg)
![[IMAGE]](http://www.darrylsgarage.com/914/914heater15.jpg)
![[IMAGE]](http://www.darrylsgarage.com/914/914heater17.jpg)
Update 10/30/24 - The 300 Mile Oil Change & Valve Adjustment Done! - Over the last couple days I've been tackling this challenging task. I started with removing the distributor cap, spark plug wires and air cleaners to get to the spark plugs and also to observe where the distributor rotor is pointing as I turn over the engine to find TDC and BDC marks on the fan hub through the little observation hole in the blower housing. The valve covers were also removed to get to the rocker arms. When I removed all 4 spark plugs I found they look sooty from running rich, but that's not a surprise since only the last 100 of the 300 miles were with the correct idle jets. After using the feeler gauges to measure the existing lash, I use a "go/no-go" technique to set the 0.006" desired clearance making sure 0.007" cannot pass through the gap. The majority of the valves were loose by only 0.001" and one by 0.002" so I"m really happy with that and it would explain the noisy valve train. I gapped and installed new spark plugs just to have a fresh baseline for reading the plugs, after installing a new oil filter, I added 3 quarts of fresh Swepco 20W-50 oil and buttoned everything back up on the top side and started the heater ductwork puzzle solving as the last task of the day. I also noted the new variation on the NGK BPR5ES packaging for the version with the removable terminal post after purchasing two sets with the solid copper terminal posts based on the prior 6-digit nomenclature alone.
![[IMAGE]](http://www.darrylsgarage.com/914/914valveadj1.jpg)
![[IMAGE]](http://www.darrylsgarage.com/914/914valveadj2.jpg)
![[IMAGE]](http://www.darrylsgarage.com/914/914valveadj3.jpg)
![[IMAGE]](http://www.darrylsgarage.com/914/914valveadj4.jpg)
![[IMAGE]](http://www.darrylsgarage.com/914/914valveadj5.jpg)
![[IMAGE]](http://www.darrylsgarage.com/914/914valveadj6.jpg)
![[IMAGE]](http://www.darrylsgarage.com/914/914valveadj7.jpg)
![[IMAGE]](http://www.darrylsgarage.com/914/914valveadj8.jpg)
![[IMAGE]](http://www.darrylsgarage.com/914/914valveadj9.jpg)
![[IMAGE]](http://www.darrylsgarage.com/914/914valveadj11.jpg)
![[IMAGE]](http://www.darrylsgarage.com/914/914valveadj10.jpg)
Update 10/23/24 - OK, Now the Heater Ductwork is Ready to Install! - I realized that I needed to recreate the rubber anti-rattle seals on the gray parts of the heater ductwork. The old ones were blasted off when I vapor honed the old paint off the parts and I kept one for measurements. I hunted down appropriate rubber material at in the plumbing department of my local hardware store and cut strips the same width and thickness. The rubber strips were carefully glued into the channels perfectly using cheap disposable artist paint brushes with the same Wurth rubber cement that I use on the weatherstrip and have them clamped in with wood clothespins overnight so they will stay in place without worry.
![[IMAGE]](http://www.darrylsgarage.com/914/914heater8.jpg)
![[IMAGE]](http://www.darrylsgarage.com/914/914heater9.jpg)
![[IMAGE]](http://www.darrylsgarage.com/914/914heater10.jpg)
![[IMAGE]](http://www.darrylsgarage.com/914/914heater11.jpg)
![[IMAGE]](http://www.darrylsgarage.com/914/914heater12.jpg)
Update 10/22/24 - Heater Ductwork is Ready to Install! - After curing and hardening for 5 days the gray paint on the heater ductwork is ready to install. All the brackets, flappers and hoses are good to go as well so now it's just a matter of getting some dry weather to put that last 50+ miles on the engine, get it nice and hot avoiding idling as much as I can, pull it on the lift, drain the oil, remove the oil filter and remove the spark plugs. Reading the spark plugs will be key in determining if my jetting is not too rich. After it cools, adjusting the valves will be the last step before buttoning it all up with fresh Swepco 306 20W50 oil, new oil filter, the heater ducting and finally the engine lid.
![[IMAGE]](http://www.darrylsgarage.com/914/914heater7.jpg)
Update 10/17/24 - Heater Ductwork Painted! - I successfully raised the temperature in the shop overnight from 62 degrees to 72 degrees F using 3 oil-filled radiator type heaters so it's within the recommended range of painting temperatures for the Rustoleum paint product I'm using. Since all the parts were vapor honed months ago, I started with a fine 6" wire wheel on my drill press to knock off any flash rust and scuff the surface for better paint adhesion. A spray down with grease & wax remover solvent and wipe off with a lint-free cloth was followed with evaporating any remnants of the solvent in the seams with my hand-held heat gun. Spraying in my new Paint Booth 2.0, now using a small size Wagner Spraying Shelter insntead of a big cardboard box, went great with all over spray immediately sucked out through a 12" x 12" furnace filter by my RIDGID dust collection fan. The opaque nylon tent roof provided plenty of light with the overhead fluorescent fixtures and allowed me to see 2 coats of paint lay down on each piece without any runs or thin areas. Now the pieces are hanging from the garage door tracks in the 74 degree F showroom where they can cure without any risk of being disturbed.
![[IMAGE]](http://www.darrylsgarage.com/914/914heater2.jpg)
![[IMAGE]](http://www.darrylsgarage.com/914/914heater3.jpg)
![[IMAGE]](http://www.darrylsgarage.com/914/914heater6.jpg)
![[IMAGE]](http://www.darrylsgarage.com/914/914heater4.jpg)
![[IMAGE]](http://www.darrylsgarage.com/914/914heater5.jpg)
Update 10/10/24 - Detailing the Engine Lid Paint Complete - The final phase of the 914 engine lid paint detailing is done, a thin coat of red over everything to blend the over spray from the earlier phases. I used a paint brush to touch-up the areas along the top edge of the grill opening before masking. I also used the "paint masking film" discovered on Vise Grip Garage. It's a 3.6" wide roll of thin 0.23Mil plastic with masking tape attached to the edge that pulls out to a 36" wide sheet of plastic that is unfolded once the tape portion has been stuck to the desired location. Just enough red paint to make everything uniformly shiny. So many nooks and crannies that it took 3 separate phases to get everything covered while minimizing the paint thickness and runs.
![[IMAGE]](http://www.darrylsgarage.com/914/914englid7.jpg)
![[IMAGE]](http://www.darrylsgarage.com/914/914englid8.jpg)
![[IMAGE]](http://www.darrylsgarage.com/914/914englid9.jpg)
Update 10/10/24 - Detailing the Engine Lid Paint Continues - Phase 2 of the engine lid painting, getting red paint into the channels previously hidden by the rain tray. Yesterday's painting cured quite well with the heater under it so I was able to mask off the the two hinge stiffening channels and get some red paint inside them. All the remaining exposed blue paint can be dealt with using a paint brush.
![[IMAGE]](http://www.darrylsgarage.com/914/914englid4.jpg)
![[IMAGE]](http://www.darrylsgarage.com/914/914englid5.jpg)
![[IMAGE]](http://www.darrylsgarage.com/914/914englid6.jpg)
Update 10/9/24 - Detailing the Engine Lid Paint - Starting on the last phase project, the engine lid and heater ducting. Removing he rain tray from the back of the engine lid exposed all kids of the original blue paint the body shop missed when they painted the car red. I went in with mineral spirits, soft brushes and wire wheels on my Dremel tool to prep the area for paint. I have a perfect match touch-up aerosol paint to deal with such issues and got a good coat on the worst areas. There are a couple minor places to hit once the first coat dries and I can mask off small areas and give them a spritz of paint too. I have the heater ducting all vapor honed and ready for wire brushing and painting once a "spray tent" I ordered shows up. When all the paint is dry, I'll run that last 56 miles on the 914 to get it good and hot before I roll it onto the lift for the 300 mile oil change and valve adjustment. Then I'll button it all up with the engine lid and heater ducting and finally call it 100% done.
![[IMAGE]](http://www.darrylsgarage.com/914/914englid1.jpg)
![[IMAGE]](http://www.darrylsgarage.com/914/914englid2.jpg)
![[IMAGE]](http://www.darrylsgarage.com/914/914englid3.jpg)
![[IMAGE]](http://www.darrylsgarage.com/914/914heater1.jpg)
Update 9/12/24 - The 0.52 Idle Jets Are the Ticket - The day started where I left off yesterday, the new 0.52 idle jets were installed in the Webers and the mixture screws all turned to one turn out. When I went to start the car the starter switch took about 9 attempts before the starter engaged, a problem that's been getting more frequent. I do have a new switch ready to install and I can hot wire the starter (like with the trigger switch I used to start the engine on the break-in run) so it's low on the priority list. Once the engine started, I put my pedal clamp on the gas pedal and let it run a few minutes at around 3000 RPM to warm up. Once it idled smoothly, I started adjusting the mixture screws, watching the needle on my vintage analog Sears RPM/dwell meter which works awesome for seeing the engine speed drop as I screw in the mixture screws. Everything went great on the left side of the engine but when I got to the right side, #4 cylinder didn't respond to the mixture screw bottoming out. I then pulled the spark plug wire and there was no change in engine RPM... A DEAD CYLINDER!!! The spark plug connector on #4 cylinder had been problematic so I fiddled with it to make sure it was making good contact but to no change in engine RPM, even after removing the rubber boot (while shocking the shit out of myself) and connecting the bare metal connector to the spark plug. Next step was shutting off the engine and pulling the spark plug. It looked wet as I would expect for a dead cylinder. My next step was drying it off with compressed air, checking the gap, which was perfect and then testing it compared to a new one in my spark plug tester. I was going to just put a new spark plug in but I discovered all 8 of my new NGK BPR5ES spark plugs have the "solid all copper" non-removable terminal posts and won't work with my spark plug wires! Anyway the test showed the spark plug out of the car appeared to be just as good as the brand new one.
![[IMAGE]](http://www.darrylsgarage.com/914/914dial-in27.jpg)
![[IMAGE]](http://www.darrylsgarage.com/914/914dial-in28.jpg)
I was stumped so I called Jack Morris for one of those "talk me off the ledge" coaching sessions. We calmly discussed everything from what a lack of compression (rings or valves) would look like to resistor issues with spark plugs and wires and the fact my Clewett Engineering wires had no resistors. The golden nugget was Jack asking if I verified that the new idle jets were not plugged and that he has seen machining debris on new ones so he always checks them. My first action after getting off the phone was to remove the idle jet for #4 cylinder. I noticed it was wet with fuel and not tightly screwed in. I thougth for sure I had got them all in tight but this one wasn't. I inspected the jet to verify it wasn't plugged, finding perfectly clean so I reassembled it and reinstialled it in the carburetor making sure it was in tight. Then I reinstalled the #4 cylinder spark plug and made double sure the spark plug wire's connector was giving me tactile feedback as it slid over the threads of the spark plug's terminal post. Before starting the car again, I made sure the #4 cylinder mixture screw was exactly 1 turn out. The car started immediately and was idling smoothly so I went to turn the #4 mixture screw in and the RPM dropped! I backed it out until the RPM came back up, set the idle at 1000 RPM while syncing the carbs with the "snail gauge" and called it fixed! So I called Jack back to inform him of my success he told me that if the idle jet o-ring is leaking air, the mixture simply drains into the cylinder as a non-atomized liquid and floods the cylinder, which makes the spark plug wet so it won't spark. So there you go, lesson learned, LOOK AT THE LAST THING YOU DID FIRST! I took the car out for a 30 mile drive and it ran fantastically, smoothly returning to the 1000 RPM idle I had set it at with every stop. Upon returning home I parked the car in its designated spot in the showroom with 180 miles on the engine, ready to go for that last 120 before the oil change and valve adjustment at 300 miles.
![[IMAGE]](http://www.darrylsgarage.com/914/914dial-in26.jpg)
Update 9/11/24 - Tweaking the Idle Jets - It took almost a week for the new idle jets to get here from Carburetors Unlimited, arriving a couple days ago. Today I took advantage of the rainy day to install the bigger idle jets and get the carburetors ready for adjusting tomorrow when I can drive it. Weber 40 IDF carburetors on a 914 are as easy as it gets. The idle jets can actually be seen from above, not totally by mirror as in the 356 and 912. I'm thinking slightly fatter 0.52 idle jets and less turns on the mixture screws will be the magic tweak. Ideally I'd like the mixture screws to be no more than one turn out. I also inspected exhaust flanges and saw #2 cylinder had some soot on the inboard side, and I was able to give its nut a little bit of a turn when tightening, this time when the engine is stone cold.
![[IMAGE]](http://www.darrylsgarage.com/914/914dial-in22.jpg)
![[IMAGE]](http://www.darrylsgarage.com/914/914dial-in23.jpg)
![[IMAGE]](http://www.darrylsgarage.com/914/914dial-in24.jpg)
![[IMAGE]](http://www.darrylsgarage.com/914/914dial-in25.jpg)
Update 9/4/24 - First Fill Up in Snohomish! - First gas run out to Snohomish Co-Op for a full tank of ethanol-free 92 octane. Branching out a little farther from home, 52 miles round-trip and it seems to run better with each outing. As I get more miles on the engine, I acceleratte a little more agressively when shifting and notice there's a bit of a stutter at transition once the engine is hot. Last run I fattened the adjustments to stop from randomly popping and now I might be running with the mixture screws too far out causing too rich at transition. I am currently running 0.50 idle jets and ordered a set of the 0.52 today from Carburetors Unlimited (carburetion.com) to see if I can lean out the mixture screws again by letting the jet fatten the mixture. This puts the total miles on the new engine at just over 150, so halfway to pulling and reading the spark plugs and adjusting the valves for the first time in the car.
![[IMAGE]](http://www.darrylsgarage.com/914/914dial-in21.jpg)
Update 9/3/24 - 100 Miles on the New Engine! - The 100 mile mark was reached on the new Porsche 914 engine. So many things ironed-out in the last 3 days of working on it. Shifting and braking all sorted out and the carburetors no longer randomly pop and spit and idle smoothly at 800 RPM when warmed up. Still chasing the elusive, only when cold exhaust leak and have crawled under the car after a long drive, when running to listen and torque down the flange nuts without any real change. Now that the shifter and carbs are dialed-in, the center console, targa bar trim and air cleaners are back in and ready for racking up some more miles. I'll keep the engine lid off until after the first valve adjustment at the 300 mile milestone.
![[IMAGE]](http://www.darrylsgarage.com/914/914dial-in19.jpg)
![[IMAGE]](http://www.darrylsgarage.com/914/914dial-in20.jpg)
Update 8/26/24 - Third Test Drive a Charm! - Finally a beautiful sunny driving in a t-shirt with the targa top off kind of day! I dove in and started from scratch adjusting the shift linkage using what I learned in the first attempt and verifying by looking at the position of the shift arm coming out of the transaxle in each position (seems obvious now). The front caliper rebuilds worked great and I could touch the left front rotor after the 10 mile loop and it was cool so no friction. That dimly glowing turn signal indicator light in the tachometer was also fixed with a new flasher relay. Now getting the carbs to idle down when hot and addressing that exhaust flange leak when it's cold. Also I see my reverse lights don't work so I need to figure that out at some point. Heck, I might be installing the targa bar trim and engine lid soon!
![[IMAGE]](http://www.darrylsgarage.com/914/914dial-in16.png)
![[IMAGE]](http://www.darrylsgarage.com/914/914dial-in17.jpg)
![[IMAGE]](http://www.darrylsgarage.com/914/914dial-in18.jpg)
Update 8/25/24 - Front Calipers Rebuilt & New Tires! - So after discovering the left front caliper was sticking my engine break-in efforts came to a complete stop. The set of brand-new JP Group front calipers I ordered from Sierra Madre Collection was responded to by a delay putting the order together e-mail but I heard today they are on their way and should be here soon. The rear JP Group calipers arrived from Stoddard and look very good so brand-new matching front and rear calipers is in my future. With the delay from Sierra Madre Collection I shot an order for rebuild kits off to AutohausAZ and 9 days later they showed up on my doorstep. Rebuilding the calipers was trouble-free, the insides look great and cleaned-up beautifully. Reassembly went smoothly, funny how having the right tool for clocking the pistons makes it so easy. Back on the car and pressure bled without any issues holding pressure or seeping. I was so excited about my DIY string wheel alignment results that I had the new Kumho 205/55R-15 tires mounted and balanced and they're now on the car. So now when the rainy weather has cleared I'm back to the business of adjusting the shifter linkage to get 4th and 5th and adjusting the cable linkage on the carbs to perfect butterfly synchronization at all throttle positions.
![[IMAGE]](http://www.darrylsgarage.com/914/914dial-in15.jpg)
![[IMAGE]](http://www.darrylsgarage.com/914/914dial-in9.jpg)
![[IMAGE]](http://www.darrylsgarage.com/914/914dial-in10.jpg)
![[IMAGE]](http://www.darrylsgarage.com/914/914dial-in11.jpg)
![[IMAGE]](http://www.darrylsgarage.com/914/914dial-in12.jpg)
![[IMAGE]](http://www.darrylsgarage.com/914/914dial-in13.jpg)
![[IMAGE]](http://www.darrylsgarage.com/914/914dial-in14.jpg)
Update 8/15/24 - The Second Drive a 10 mile Success, Almost! - Second drive in the 914 and it ran so nice it turned into a 10 mile loop on the perfect new ring-bedding roads around my house. A few things to adjust before the third drive but my DIY string wheel alignment resulted in a perfect hands-off-the-wheel straight tracking car. The new struts and sway bars really make the car feel planted and yet ready to pounce! No oil drips, torque pulls like a mule, carbs have no hesitation at transition, or popping... that's the engine. My shifter adjustment was better, could now get reverse and second but not fourth and fifth so that needs a second try. The one major setback is a sticking left front brake caliper. Pulling it into the shop and onto the 4-post lift after the successful 10-mile test run I noticed a very loud squeal from the left front wheel. I jacked up the front of the car and noticed the wheel was very hard to turn half of each revolution. Sticking brake caliper for sure but rotating harder on only half the revolution, do I have a warped brake rotor too? Well today I got out the dial gauge and measured exactly how warped the rotor is. Luckily only 0.0032" and the spec is a max of 0.008" so PHEW, it's OK. The front calipers are from the original build back in 1993 so it's not a surprise. I think sitting 2 years kind of did them in. I have a set of brand-new aftermarket ones on the way from Sierra Madre Collection so we'll see how long that takes to get here. I have a minor seeping leak on the right rear caliper and I already ordered a new aftermarket set of those from Stoddard that should be arriving today. Funny but the brake calipers were the only thing besides the steering rack that wasn't replaced in this latest restoration work but now they will be.
![[IMAGE]](http://www.darrylsgarage.com/914/914dial-in4.png)
![[IMAGE]](http://www.darrylsgarage.com/914/914dial-in5.png)
![[IMAGE]](http://www.darrylsgarage.com/914/914dial-in6.png)
![[IMAGE]](http://www.darrylsgarage.com/914/914dial-in7.jpg)
![[IMAGE]](http://www.darrylsgarage.com/914/914dial-in8.jpg)
Update 8/9/24 - Dial-in Phase Begins! - So time to get this Porsche 914 dialed-in. I started the day re-checking the shift linkage grub screws which looked perfect. Next was removing the protective panels and re-tightening the exhaust flange nuts of which a couple gave me an ever-so-gentle little bit of a socket wrench turn. Jack says do it again after getting the engine nice and hot so I left the protective plates off. Finally it was time to dig into why the shifter is not engaging in 2nd, 4th or reverse, which required removing the center console. I was able to remove the center console but keep the gauges attached so I can test drive with engine function readings intact. In neutral, the lower portion shifter is supposed to be perfectly vertical, mine cants forward. That means the shaft down the center tunnel needs to be adjusted longer or drivetrain (engine/transaxle unit) moved forward in the 4 mount positions. I'm in ponder and study possible approaches mode now. There are so many possible adjusting positions with the engine and transaxle mounting points, I need to figure out what is the most correct approach. I certainly didn't think this is where I would be at this point but that's all part of the challenge of taking something completely apart, putting it all back together and making it work!
![[IMAGE]](http://www.darrylsgarage.com/914/914dial-in1.jpg)
![[IMAGE]](http://www.darrylsgarage.com/914/914dial-in2.jpg)
![[IMAGE]](http://www.darrylsgarage.com/914/914dial-in3.jpg)
Update 8/8/24 - First Drive a Success! - Back from the first drive! Not a drop of oil under the car! It was a short drive only on my street because I couldn't shift into 2nd due to shifter adjustment issues. Hey, new motor and transaxle mounts, rebuilt transaxle, a lot has changed, just gotta play with the linkage. The engine started up immediately, idles beautifully and it's startling how quickly it revs with the lightweight Carrillo rods and cable linkage pedal response. A little exhaust leak on one of the cylinders that needs some flange nut re-torquing that I was told to expect. The big freak-out was looking down to see my oil pressure gauge was pegged out on high, but afterwards I noticed it happens when I turn on the switch so it's a connection issue not an engine issue. The car tracks straight, stops and the engine sounds wicked good running up and down my street in first gear! Back to the hanger to let it cool off and then let the tweeking begin! Of course my oil pressure gauge issue ended up being more dyslexia than mechanical!
![[IMAGE]](http://www.darrylsgarage.com/914/914success1.jpg)
![[IMAGE]](http://www.darrylsgarage.com/914/914success2.jpg)
![[IMAGE]](http://www.darrylsgarage.com/914/914success3.jpg)
Update 8/7/24 - Ready for the First Drive! - I started with attaching the CV-joints at noon and ended with the rear bumper (and license plate) and torquing the rear wheels to 95 foot pounds at 8 PM tonight. It really is amazing how quickly everything goes the second time with all the tricks I learned in the struggles to get it together the first time. Everything is ready to hook up the battery and start it from the driver's seat, then drive it tomorrow and wouldn't you know it, it's supposed to be cloudy and cool, perfect!
![[IMAGE]](http://www.darrylsgarage.com/914/914rework20.jpg)
![[IMAGE]](http://www.darrylsgarage.com/914/914rework21.jpg)
![[IMAGE]](http://www.darrylsgarage.com/914/914rework22.jpg)
Update 8/6/24 - The Engine is Back in the Car! - I started the day installing the new left rubber engine compartment seal and ended it by lowering it off the jack stands and rolling it onto the 4-post lift. It's amazing how smoothly everything goes the second time. The Weber carburetors were stripped of their velocity and jet stacks for maximum clearance and it ended up being necessary. Gaffer tape over the open throats guarantees nothing accidentally falls into them. The carbs were dialed-in over in Spokane so an extra effort made not to mess up the throttle cable settings. My floor jack also worked just well enough, only puking hydraulic fluid when lowering it so I just topped it off before lifting the engine and then again lifting the car off the floor jacks. Disassembling floor jacks and sending the jack ram into a repair shop is a winter project. Torquing the rear axle nuts to 225 ft.lbs. and securing with a cotter pin before bolting on the wheels. Now just hook up the CV-joints, cables, fuel lines and electrical wires and it's ready for that first drive!
![[IMAGE]](http://www.darrylsgarage.com/914/914rework14.jpg)
![[IMAGE]](http://www.darrylsgarage.com/914/914rework15.jpg)
![[IMAGE]](http://www.darrylsgarage.com/914/914rework16.jpg)
![[IMAGE]](http://www.darrylsgarage.com/914/914rework17.jpg)
![[IMAGE]](http://www.darrylsgarage.com/914/914rework18.jpg)
![[IMAGE]](http://www.darrylsgarage.com/914/914rework19.jpg)
![[IMAGE]](http://www.darrylsgarage.com/914/deadjack.jpg)
Update 8/4/24 - The Engine is Back from Spokane - JB Morris delivered my 914 engine back over from Spokane so I'm back in business getting the car back on the road in the coming days! Timing was perfect as Jack was in town to transport his 356B project after rust repair from Ted Atkins shop here in Woodinville to Ethan Cartmill's body shop in Yelm. JB is turning 15 in about a week, so his driver's license isn't far off. He already has a '63 Ford Galaxy he's purchased as his first car and with his side-hustle Porsche mechanic wages should be road worthy in plenty of time for his learner's permit in 6 months.
![[IMAGE]](http://www.darrylsgarage.com/914/914rework13.jpg)
Update 8/2/24 - Getting Ready for an Engine - The drive axles had to come out because I need the now set-up carburetors and cable linkage to stay on the engine as it's rolled into position on the floor jack. I cleaned up the inner CV-joints to remove all the grease putting them in ZipLoc bags during the engine removal had caused. I also noticed the left and still original engine compartment rubber seal was split so I removed it, then straightened and repainted the sheet metal channel. I cut a new seal to match the old one out of a length of new rubber seal material. I'll be installing the new one once the paint cures.
![[IMAGE]](http://www.darrylsgarage.com/914/914rework8.jpg)
![[IMAGE]](http://www.darrylsgarage.com/914/914rework9.jpg)
![[IMAGE]](http://www.darrylsgarage.com/914/914rework10.jpg)
![[IMAGE]](http://www.darrylsgarage.com/914/914rework11.jpg)
![[IMAGE]](http://www.darrylsgarage.com/914/914rework12.jpg)
Update 8/1/24 - JB is Wrapping-up The Rework! - Meanwhile back in Spokane, JB has all the oil leaks resolved and they were all just as we suspected. The leak from the bellhousing was a threaded brass oil galley plug installed by the machine shop that was weeping and sealing it with red LocTite cured it. Discovering and replacing a pinched o-ring on the #1 exhaust valve push rod tube resolved leak number 2. A new aluminum seal ring on the oil pressure bypass valve plug cured the final and smallest drip. Jack recommended that they swap out my copper exhaust manifold nuts for the steel ones he regularly uses becase the copper ones are known to sieze on the stud and give a false reading on the torque wrench when tightening them leading to exhaust leaks. Now the engine has fresh Swepco 306 20W-50 oil and filter and the valves have been adjusted to 0.006" clearance after running the engine again. The timing and dwell has been set for the freshly rebuilt German Bosch 009 distributor as well as the carburetors synched and adjusted. No jetting changes have been made at this point, running the same 130 main jets, .50 idle, F7 imulsion tubes, 32 mm venturis and 200 air correction jets as on the old 1.8 liter engine. Basically JB and Jack will have the engine be turn-key and ready to drive and start tuning the carburetors once it's back in the car and everything reconnected. The dual 911 lifting loops I installed have really made it easy for them to use their cherry picker engine hoist to work on the engine and leaving my wooden transport cradle in place.
![[IMAGE]](http://www.darrylsgarage.com/914/914rework6.jpg)
![[IMAGE]](http://www.darrylsgarage.com/914/914rework7.jpg)
Update 7/28/24 - The Engine is Back Out and Off to Spokane! - My 912 buddy Rob Eiring came over to help me drop the engine back out of the 914 and I built a wood transport cradle out of 2x4s for the ride back to Spokane. The plan is to have Jack and JB resolve the oil leaks and then have everything necessary to run the engine to insure the leaks are fixed. The added benefit is the valves will be adjusted (outside the car), timing set, oil changed to Swepco 306 and carburetors dialed-in so the engine will be ready to drive when back in the car.
![[IMAGE]](http://www.darrylsgarage.com/914/914rework1.jpg)
![[IMAGE]](http://www.darrylsgarage.com/914/914rework2.jpg)
![[IMAGE]](http://www.darrylsgarage.com/914/914rework3.jpg)
![[IMAGE]](http://www.darrylsgarage.com/914/914rework4.jpg)
![[IMAGE]](http://www.darrylsgarage.com/914/914rework5.jpg)
Update 7/23/24 - Home Alignment Done! - Today I finally wrapped-up the DIY wheel alignment on the 914. I really learned a lot and realize it's really quite simple, just a lot of very precise adjustments to zero the toe-in and camber, it's really easy to go too far and then have to start over. I set the toe-in at 1/8" front and rear and camber at 0.85 degrees (the range is 0.50 to 1.0 degrees). I think I have the car pointed straight based on my mason line measurements of the wheels offsets and then did the toe-in adjustments using my "toe plates" with tape measures.
![[IMAGE]](http://www.darrylsgarage.com/914/914align1.jpg)
![[IMAGE]](http://www.darrylsgarage.com/914/914align2.jpg)
![[IMAGE]](http://www.darrylsgarage.com/914/914align3.jpg)
![[IMAGE]](http://www.darrylsgarage.com/914/914align4.jpg)
![[IMAGE]](http://www.darrylsgarage.com/914/914align5.jpg)
![[IMAGE]](http://www.darrylsgarage.com/914/914align6.jpg)
![[IMAGE]](http://www.darrylsgarage.com/914/914align7.jpg)
![[IMAGE]](http://www.darrylsgarage.com/914/914align8.jpg)
Update 7/16/24 - The Engine Break-In Run is Done! - Well, the break-in run on the 1974 Porsche 914 was a mixed bag. Oil pressure went up to 20 PSI quickly after adding the break-in oil and cranking the engine with the spark plugs out. Pressure and leak testing the fuel system went equally well. The engine fired right off, immediately settled into 2000 to 2500 RPM, exhaust smoke cleared-up as the rings honed and it ran the full 20 minutes without any issues so the new cam has been successfully bedded. The bad news, 3 oil leaks that were observed as growing puddles under the car, not bad enough to shut down the break-in run but bad enough that the engine has to come back out of the car. The biggest leak comes out of the bell housing suggesting one of the new brass oil galley plugs wasn't properly sealed by the machine shop. The other two leaks are minor, a drip from the oil pressure bypass plug on the right front of the engine and a push rod tube seal on #1 exhaust valve, neither of which would require an engine drop. Poor JB Morris is bummed about not delivering perfection but trust me, compared to the rework I was responsible to make right working as an "apprentice" for Jack at Wolfsburg Motorwerks back in 2007 to 2009, this is routine. The 4 hour distance between us is what makes it more of a logistical headache but easily resolved. I'm going to sieze on the opportunity to perform the wheel alignment with the weight of the drivetrain and full fuel tank in the car so when I do get the engine back in it, I can immediately drive it. Another silver lining to removing the engine is that that first valve adjustment can be done outside the car! I know Jack and JB have my back and we'll get to the bottom of these leaks, like sports, it's a long season and this is just one game in the loss column. The good thing is the engine won't have to be torn down, just the flywheel removed. I installed the air cleaners for a photo just for inspiration for what is to come eventually.
![[IMAGE]](http://www.darrylsgarage.com/914/914brkin1.jpg)
![[IMAGE]](http://www.darrylsgarage.com/914/914brkin2.jpg)
![[IMAGE]](http://www.darrylsgarage.com/914/914brkin3.jpg)
![[IMAGE]](http://www.darrylsgarage.com/914/914brkin4.jpg)
![[IMAGE]](http://www.darrylsgarage.com/914/914brkin5.png)
![[IMAGE]](http://www.darrylsgarage.com/914/914brkin6.jpg)
![[IMAGE]](http://www.darrylsgarage.com/914/914brkin7.jpg)
![[IMAGE]](http://www.darrylsgarage.com/914/914brkin8.jpg)
![[IMAGE]](http://www.darrylsgarage.com/914/914brkin9.jpg)
Update 7/15/24 - The Engine is In the Car! - Of course the engine long block is ready to go as the busy season begins and it has to commpete with spring cleanup, gardening and bringing all the other cars out of their winter hibernation as well as the boat. On June 1st I finally rolled the 914 out of its almost 2 year storage spot in the showroom and back onto the 4 post lift in the workshop. Then began the quite intensive task of installing all the external components, mating it with the freshly rebuilt transaxle and installing it into the car. Next came the carburetors, wiring, fuel lines, clutch cable, CV joints and numerous other small but vital bits that make a running engine. I got the exhaust system and shift mechanism installed today and the custom throttle cable from Terrycable to accommodate moving the Tangerine Racing cable throttle linkage pulleys to the back side of the engine arrived in today's mail.
![[IMAGE]](http://www.darrylsgarage.com/914/914engin1.jpg)
![[IMAGE]](http://www.darrylsgarage.com/914/914engin2.jpg)
![[IMAGE]](http://www.darrylsgarage.com/914/914engin3.jpg)
![[IMAGE]](http://www.darrylsgarage.com/914/914engin4.jpg)
![[IMAGE]](http://www.darrylsgarage.com/914/914engin5.jpg)
![[IMAGE]](http://www.darrylsgarage.com/914/914engin6.jpg)
![[IMAGE]](http://www.darrylsgarage.com/914/914engin7.jpg)
![[IMAGE]](http://www.darrylsgarage.com/914/914engin8.jpg)
STEP-BY-STEP BLOG: For the granular step-by-step process of taking the long block from the engine stand to a driving car, I've created a Facebook Photo Album. Click on the 914 image below to access a link to a Facebook album containing all the details of the work performed.
Update 3/28/24 - The Transaxle is Home! - I got a call from John Walker that my tranny was done so I went and picked it up today. Nothing major was amiss, all the bearings look perfect, just normal wear so John replaced the worn shift sleeves, syncros and a new 1st gear. With new seals and fresh gear oil it came in at $2,206. John also replaced all the M8 nuts with fresh gold cadmium-plated ones so everything looks nice and fresh, no drips and clean as a whistle. I will need to change the gear oil after 500 miles to flush out any metal worn off the new parts as they hone themselves into place. I didn't plan on doing anything to the transaxle but couldn't resist the temptation now while the engine is out of the car and know I know it's all good as new.
![[IMAGE]](http://www.darrylsgarage.com/914/914tranny1.jpg)
![[IMAGE]](http://www.darrylsgarage.com/914/914tranny2.jpg)
![[IMAGE]](http://www.darrylsgarage.com/914/914tranny3.jpg)
![[IMAGE]](http://www.darrylsgarage.com/914/914tranny4.jpg)
Update 3/4/24 - The 914 Engine is Home! - Thu and I made a weekend of it and drove over the snowy mountain pass to Spokane to retrieve the 914 engine from JB. It was also Jack Morris' 60th birthday party on Saturday night so fun to catch up with many of my old Wolfsburg Motorwerks buddies and customers who made the trip from all over to be there for the celebration. My old Wolfsburg Motorwerks co-worker and buddy Adam Bruno who also now has his own shop in Spokane was there and I think Jack's t-shirt said it all, "If you're not first, you're last". Having an engine cherry-picker sure makes getting an engine out of the back of our Honda CR-V easy.
![[IMAGE]](http://www.darrylsgarage.com/914/914JB-19.jpg)
![[IMAGE]](http://www.darrylsgarage.com/914/60yojack.jpg)
![[IMAGE]](http://www.darrylsgarage.com/914/914enghome.jpg)
Update 1/15/24 - JB Morris is THE MAN! - Jack Morris, owner of Morris Garage in Spokane, Washington turned his 14-year-old son JB loose on my 1.8 liter 914 engine a few weeks ago at the beginning of his Christmas break from school to add bore and stroke to it using factory parts to turn it into a 2.0 liter. Tonight Jack sent me photos of JB installing the clutch and valve covers and a text informing me that he's done with it. The case had been vapor honed and the oil galley plugs removed and tapped for removable brass plugs to facilitate thorough cleaning the blasting media out of the oil passageways to prepare it for reassembly. My 1.8 liter case checked out at standard bore, not needing any machining for oversize bearings. Jack sourced a used 2.0 liter crank shaft not needing any machining so standard main bearing and connecting rod bearing journals, like a brand-new engine. The new Carrillo connecting rods are standard sized bearings as well so everything is like a new engine and the oil pressure is not negatively effected. The days of quality, bargain-priced German-made Mahle or Kolbenschmidt piston and cylinder sets are over. The only reasonably priced piston and cylinder sets available on the market are cast iron AA Products in a standard wall thickness, stock 2.0 liter 94 mm bore. Jack steers customers away from the 96 mm big-bore pistons and cylinders as the thinner cylinder walls tend to go out of round fairly quickly. Chinese-made AA Performance Products cylinders have known quality control issues that must be addressed prior to use. Casting flash needs to be cleaned up on the mold seams on the top and bottom sides of the cylinder's fins. The cylinder's wall length from the base that mounts flush to the case and top that presses against the head to form a seal must be measured and honed to the shortest one's measurement to make the set match. The pistons also need to be weighed and excess material removed if necessary to insure that they are all the same to balance the rotating mass. Better quality Grant piston rings are used in place of the "mystery alloy" Chinese ones that come with the AA Performance Products set. The cam grind Jack's chosen is a time-proven Elgin profile specific for use with Weber carburetors that insures smooth idle but a nice early peaking torque curve. The old cooling tins, valve covers and oil sump plate were all freshly powder coated semi-gloss black and all the hardware gold zinc plated.
![[IMAGE]](http://www.darrylsgarage.com/914/littlejb.jpg)
JB has been helping his Dad build engines as his apprentice practically since he learned to walk and is already competant with building air-cooled VW Type-1 engines, Porsche 356 and 912 engines and now 914 VW Type-4 engines. The pandemic-related delay on getting my heads back from the machine shop actually created this opportunity to have JB build my engine. Jack only lets him build customer's engines if they request him and he already has quite a growing fan club. It's a family affair at Morris Garage, Jack's daughter, now 16-year-old Sara runs his shipping department and their softwarre engineer Mom Rachael who works from home checks in frequently to see the progress on JB and Jack's projects. I'm very excited to get this 914 project going again after sitting stalled for a year and can't wait to see the performance improvement over the previous 1.8 liter, hydraulic lifter engine in the car with all new Bilstein struts and the addition of front and rear factory anti-sway bars. I'm so elated that JB will be asking how the engine he built is running for years to come. JB started by sorting and organizing all the parts, AA Performance Products piston and cylinder set, a new balanced Sachs flywheel and clutch pressure plate, light weight Carrillo H-beam connecting rods, new oil pump and all the engine hardware that had been run through the engine washing machine. The case was thoroughly cleaned in the engine washing machine and oil passageways brushed and flushed out. As you can see in the background, Jack's shop is a fully-equipped machine shop so any fitment issues ran into with the new parts could be precisely reworked on the lathe or mill if necessary.
![[IMAGE]](http://www.darrylsgarage.com/914/914JB_1.jpg)
JB sporting his Barrett Auction t-shirt and using a 3M Scotchbrite pad to clean up and chase the threads on all the hardware parts as he organized them for reassembly.
![[IMAGE]](http://www.darrylsgarage.com/914/914JB_2.jpg)
JB patiently heating up the crankshaft timing gear with a MAPP gas torch to expand it so it slides easily onto the crankshaft clamped in the vise on the workbench behind him.
![[IMAGE]](http://www.darrylsgarage.com/914/914JB_3.jpg)
The casting flash on the top and bottom mold seams between the AA Performance Products cylinder fins is no match for JB and a diamond-tipped cutting tool specifically designed for the task.
![[IMAGE]](http://www.darrylsgarage.com/914/914JB_4.jpg)
Fully seating the rear thrust bearing into the bearing saddle's dowel pin that keeps it from spinning in the case is marked with a pen so that when it's installed on the crankshaft, JB knows when it's fully seated.
![[IMAGE]](http://www.darrylsgarage.com/914/914JB_5.jpg)
The Carrillo H-beam rods are installed with the crankshaft in the workbench vise using CARR stretch bolts which are not torqued but rather the stretch measured using a special fixture holding a dial gauge. Spec for the stretch is between 0.004" and 0.006" so JB set them to 0.005". These light-weight connecting rods will significantly reduce the rotating mass and raise the red line RPM limit of the engine. Jack has a huge collection of used VW Type-4 cam timing gears so finding one with the perfect lash with the new crankshaft timing gear was easy for JB.
![[IMAGE]](http://www.darrylsgarage.com/914/914JB_6.jpg)
After test torquing the case bolts to make sure there was no binding with the new bearings when rotating the crankshaft, JB took it all apart for the last time, installed the camshaft plug, applied Dirko sealant to the case mating surfaces and performed the final torquing of the case bolts. The last steps were installing the pulley oil seal and oil pump.
![[IMAGE]](http://www.darrylsgarage.com/914/914JB_7.jpg)
Jack's 16-year-old Sara shipping off a crankshaft for machine work as part of her duties running his shipping and receiving department. Watching these kids grow up has brought a lot of joy to my life and seeing them turn out to be such great kids just makes my heart swell with pride.
![[IMAGE]](http://www.darrylsgarage.com/914/914JB_8.jpg)
JB weighed each piston and balanced them by removing material from the heavier ones to match the lightest one. He also checked the gaps of the new Grant rings with a feeler gauge inside the cylinders and brought them all into the specified gap.
![[IMAGE]](http://www.darrylsgarage.com/914/914JB_9.jpg)
JB's Mom Rachael and sister Sara checking on his progress as he was preparing to measure the deck height using a piece of solder glued to the piston top to crush it and determine the thickness of the copper cylinder base (barrel) shims to get the desired clearance between piston and head. The goal was to set it to the European 914 2.0 compression ratio of 8.6:1 due to the flat top pistons not used in U.S. models, which used dished pistons to reduce the compression ratio to 7.6:1 in order to meet emission standards.
![[IMAGE]](http://www.darrylsgarage.com/914/914JB_10.jpg)
Checking the deck height by installing the nuts on the head studs and torquing them to spec with no barrel shims and doing the crush test with a strip of solder glued to the piston top, rotating the engine, then disassembling and measuring the thickness of the solder strip after it was crushed. The barrel shim thickness is the difference between the desired piston to head clearance and the thickness of the crushed solder strip.
![[IMAGE]](http://www.darrylsgarage.com/914/914JB_11.jpg)
Jack tells me that JB bought a new torque wrench with his own money for this task and you know it's a good one, Snap-On not Harbor Freight!
![[IMAGE]](http://www.darrylsgarage.com/914/914JB_12.jpg)
First head installed with the desired barrel shim thickness, pistons and cylinders assembled, sealed and head torqued to spec. Once JB was done with the hard side, the one that takes all the trial-and-error to determine the deck height, the other side is just a matter of careful assembly, assuming nothing, double checking each barrel shim's thickness so everything matches perfectly.
![[IMAGE]](http://www.darrylsgarage.com/914/914JB_13.jpg)
JB gives the "thumbs up" now that both heads are installed and ready for valve train installation. The flimsy factory temperature sensor sheet metal "taco plate" was replaced with a 914 Werks billet almuinum unit using a VDO sender designed for the VDO temperature gauge installed in the console. I have the original factory console gauges but wanted an oil pressure gauge in the console so I went with all matching VDO Cockpit gauges to bring the total gauges in the console to 4; voltage gauge, oil pressure, oil temperature and a clock.
![[IMAGE]](http://www.darrylsgarage.com/914/914JB_14.jpg)
The freshly powder coated cylinder cooling tin installed with new gold annodized hardware. The new flywheel was also installed after setting the end play to spec using a stack of 3 shims and installing the rear oil seal.
![[IMAGE]](http://www.darrylsgarage.com/914/914JB_15.jpg)
The valve train all installed and JB setting the valve lash. Last step was installing the distributor drive shaft clocked at #1 cylinder Top-Dead-Center so the slot in the drive works with a Bosch 009 mechanical centrifugal advance distributor. I have purchased a rebuilt German-made Bosch 009 distributor that I'll install when I get the engine back home.
![[IMAGE]](http://www.darrylsgarage.com/914/914JB_16.jpg)
Installing the new clutch disc and pressure plate which had been sent off to be balanced with the new flywheel, torquing the bolts to spec.
![[IMAGE]](http://www.darrylsgarage.com/914/914JB_17.jpg)
Last step, intalling the bales and clamping the valve covers into place. Ready to pick up when the mountain passes between Seattle and Spokane are not a test of courage! Great job JB!
![[IMAGE]](http://www.darrylsgarage.com/914/914JB_18.jpg)
Update 9/4/23 - The Heads are FINALLY Back From Competition Engineering! Look what my buddy Jack Morris sent me today, my 1974 Porsche 914 heads finally showed up from Competition Engineering after a nearly 2 year wait. The pandemic reaped havoc on the machine shop with half its crew retiring instead of being laid-off which speaks to the average age of qualified machinists. All I know is that my heads have been restored to as new condition by the best in the business. Now it won't be long until Jack and JB have my engine together and I have a winter project getting my first Porsche back on the road!
![[IMAGE]](http://www.darrylsgarage.com/914/914-20-290.jpg)
![[IMAGE]](http://www.darrylsgarage.com/914/914-20-291.jpg)
![[IMAGE]](http://www.darrylsgarage.com/914/914-20-292.jpg)
![[IMAGE]](http://www.darrylsgarage.com/914/914-20-293.jpg)
Update 9/8/22 - The Carrillo Rods Have Finally Shown Up! - My Porsche engine building prodigy, JB Morris reports the Carrillo connecting rods have finally arrived for my hot rod 914 2.0 build. Strange times at Carrillo, the company shutdown during the pandemic and most of the old-timers elected to retire rather than being furloughed. The person who answered the phone when the business reopened was a new hire that didn't know the specs for a Porsche 2.0 connecting rod so a stock one needed to be sent to them! It's been a long strange road in the 12 months since I dropped the engine for rebuilding and we're still waiting for Walt Watson at Competition Engineering to do his magic on the heads. The backlog at his machine shop has never been longer since all the vintage Porsche nuts had too much time on their hands working from home and such and had more time for their hobby.
![[IMAGE]](http://www.darrylsgarage.com/914/914-20-288.jpg)
![[IMAGE]](http://www.darrylsgarage.com/914/914-20-289.jpg)
Update 7/27/22 - Rear Trunk Detailed / Off to Storage Waiting for an Engine - I finally wrapped up the new wiring tab insulators, torquing the rear shocks and installing new top hook storage cups and rubber covers over the shock mounts. Then it was off to the "showroom" with my signature "floor mirrors" which I had my sheet metal supplier cut polished 18-gauge stainless steel inserts for standard galvanized drip pans so I can appreciate the undersides of my cars. Now it's all in my buddy Jack Morris' hands, he's stuck in a quagmire of supply chain issues that must be really difficult for a man in his business to deal with. For me, it's a first-world problem, the old man's toy doesn't have an engine, I don't have mouths to feed.
![[IMAGE]](http://www.darrylsgarage.com/914/914-20-287.jpg)
![[IMAGE]](http://www.darrylsgarage.com/914/914-20-281.jpg)
![[IMAGE]](http://www.darrylsgarage.com/914/914-20-282.jpg)
![[IMAGE]](http://www.darrylsgarage.com/914/914-20-283.jpg)
![[IMAGE]](http://www.darrylsgarage.com/914/914-20-284.jpg)
![[IMAGE]](http://www.darrylsgarage.com/914/914-20-285.jpg)
![[IMAGE]](http://www.darrylsgarage.com/914/914-20-286.jpg)
Update 7/26/22 - Front Bumper and Apron Back On / Rear Trunk Wiring / Off 4-Post Lift - My wife helped me mount the front apron and bumper and I was finally able to roll the car off the 4-post lift. Unfortunately it is 95 degrees outside so in order to keep the cool air in the shop I needed to keep the door shut. No problem, I finally turned my attention to the rear trunk that was painted by the body shop when the car was painted and they just painted the wiring tabs with the plastic covers on them. I removed the old plastic covers, heated one up to straighten it out and measure it and made a pattern to reproduce the 9 new ones required. I also broke out the red touch-up paint and painted all wiring tabs red where they were covered by the plastic. I'll let them dry overnight and before installing new plastic insulator tubing which is available by the foot from 914 Rubber.
![[IMAGE]](http://www.darrylsgarage.com/914/914-20-280.jpg)
![[IMAGE]](http://www.darrylsgarage.com/914/914-20-270.jpg)
![[IMAGE]](http://www.darrylsgarage.com/914/914-20-277.jpg)
![[IMAGE]](http://www.darrylsgarage.com/914/914-20-278.jpg)
![[IMAGE]](http://www.darrylsgarage.com/914/914-20-279.jpg)
Update 7/25/22 - Driving Light Restoration Completed - While waiting for the fresh gloss black engine enamel on the driving light rings to cure and harden, I went ahead and vapor honed and repainted the ring retaining clips and the special concave adjusting washers. The concave adjusting washers were only corroded on the outer exposed side so I rigged up a couple washers and M8 bolt to protect the good plating inside while I vapor honed and painted only the outside surface. After gently polishing the slivered reflectors with Semichrome polish on a microfiber cloth, everything turned out great and the new lenses snapped right into place without losing one of the 4 wire retaining spring clips (as I've done before only to find later) or even more probable, putting an eye out! I happened to have new correct length partial thread M8 bolts and wavy washer in gold cadmium to replace the old corroded ones. Once it place and comparing before and after photos, it was ample proof the efforts were worth the trouble.
![[IMAGE]](http://www.darrylsgarage.com/914/914-20-271.jpg)
![[IMAGE]](http://www.darrylsgarage.com/914/914-20-272.jpg)
![[IMAGE]](http://www.darrylsgarage.com/914/914-20-273.jpg)
![[IMAGE]](http://www.darrylsgarage.com/914/914-20-274.jpg)
![[IMAGE]](http://www.darrylsgarage.com/914/914-20-275.jpg)
![[IMAGE]](http://www.darrylsgarage.com/914/914-20-276.png)
Update 7/22/22 - Gas Tank, Fuel Pump In and Driving Light Restoration Started - The bottom side of the gas tank needed a little attention to some surface rust starting so I treated it with SEM Rust Seal before installing new hoses. Mounting it back into place went quickly after detailing all the hard to get to places up around the heat and defroster ducting. Then I turned my attention to the 3-5 PSI Mr. Gasket electric fuel pump, which also quickly went back into place since I had already installed this for my Weber carburetors a couple years ago. Finally it was time to turn my attention to the rock pitted lenses on the driving lights which I have had new Hella lenses stashed in my parts collection for decades but never took the time to install them. The brass rings that hold the lenses had some rock pits so I went ahead and vapor honed them to bare metal and gave them two coats of gloss black high temperature engine enamel so they'll really make those new lenses pop. Now to step away for a couple days to let the paint cure before reassembly.
![[IMAGE]](http://www.darrylsgarage.com/914/914-20-263.jpg)
![[IMAGE]](http://www.darrylsgarage.com/914/914-20-264.jpg)
![[IMAGE]](http://www.darrylsgarage.com/914/914-20-265.jpg)
![[IMAGE]](http://www.darrylsgarage.com/914/914-20-266.jpg)
![[IMAGE]](http://www.darrylsgarage.com/914/914-20-267.jpg)
![[IMAGE]](http://www.darrylsgarage.com/914/914-20-268.jpg)
Update 7/19/22 - Front Wheels Back on the Ground! - The front wheels of the 914 project are finally back on the ground. The two M14-1.5 left-hand thread nuts for the inner tie rod ends arrived via FedEx from Bellmetric at about 2 PM and I could finally finish buttoning everything up and doing the final torquing. Now just the fuel pump and gas tank and it's off the 4-post lift and back in the showroom waiting for an engine to arrive. Any further wheel alignment and ride level setting work must now wait until I have the weight of the drivetrain and a full gas tank. Installation of the protective bellypan for the steering rack will also wait until then.
![[IMAGE]](http://www.darrylsgarage.com/914/914-20-262.jpg)
Update 7/16/22 - Everything Torqued and Torsion Bars Installed - One of my motives for frequently posting on the local Porsche club's Facebook group page and writing articles for their magazine is fishing for Porsche buddies younger than me. I hit the goldmine with my buddy Brent, who is a professional Porsche mechanic at the Bellevue Porsche dealership. He and his delightful wife Mayumi stopped by today to help me torque the ball joints to 180 foot pounds, definitely a two-man job. He also helped me with torquing the new shock nuts on their top perches and inspected my front torsion bars before I installed them. Brent mentioned he's stoked about being sent to the Porsche Classic factory-sponsored training classes focused on repairing vintage Porsches so we have a shared passion.
![[IMAGE]](http://www.darrylsgarage.com/914/914-20-254.jpg)
![[IMAGE]](http://www.darrylsgarage.com/914/914-20-255.jpg)
After Brent left, I proceeded to torque all the suspension bolts and installed the torsion bars, the ride height mechanisms, closing caps and protective guards. I was not able to put the adjusting arms on the same splines from left to right as the left side ball joint is about 3/8" lower than the right. I figured the tight new suspension bushings in combination with the new sway bar is probably keeping me from moving the A-arms with only a pry bar. I decided I'll wait until I can get the wheels on the ground with the engine and transaxle weight plus a full tank of gas before really worrying about ride height and just let it like it is for now, it might actually settle itself out with me just sitting on the bumper once the wheels are back on.
![[IMAGE]](http://www.darrylsgarage.com/914/914-20-256.jpg)
![[IMAGE]](http://www.darrylsgarage.com/914/914-20-257.jpg)
![[IMAGE]](http://www.darrylsgarage.com/914/914-20-258.jpg)
![[IMAGE]](http://www.darrylsgarage.com/914/914-20-259.jpg)
![[IMAGE]](http://www.darrylsgarage.com/914/914-20-260.jpg)
![[IMAGE]](http://www.darrylsgarage.com/914/914-20-261.jpg)
Update 7/14/22 - Steering Rack Belly Pan Back from Seattle Powder Coating - So $157 later I have a belly pan that will stand up to brake fluid and gasoline. While I expected a new reproduction belly pan from Automobile Atlanta, what I got is so full of hammer marks once blasted and powder coated, it looks like a restored original. At first I was kind of disappointed but now am thinking that something that looks like a restored original might actually look better. With the 914 Rubber seals installed it's ready to mount on the car once I get all the work underneath it buttoned-up.
![[IMAGE]](http://www.darrylsgarage.com/914/914-20-253.jpg)
Update 7/13/22 - New Front Brake Lines Installation Completed and Fluid Bled - The day started with the removal of the old brake lines that connect the master cylinder to the left and right fender hose connection brackets that I had plugged to keep the fluid in the system. I decided to just remove the banjo bolt that attaches both to the master cylinder and then recondition the fittings by wire brushing the brass banjo fitting and vapor honing the steel bolt before painting the exposed section black to protect it from corrosion. Installation of the new lines from PMB Performance using new copper sealing washers for the banjo fitting was super easy as the pre-formed shapes were perfect. Once all the connections were tightened, I went ahead and attached the pressure bleeder and pumped it up to 20 PSI to detect leaks. Only the fitting on the left hose to line connection was dripping so with a quick tightening all was holding pressure. Bleeding the front brakes starting with the lower of the two bleeder valves on the right caliper, furthest from the master cylinder, then the top bleeder valve. The same bottom first then top technique was done on the left side and a hard pedal was instantly achieved with no additional drama. Some seepage from the left top bleeder valve was discovered and tightened and now all is nice and dry and the brakes lock and unlock as the pedal is pressed. That work checks the brakes off the list and now to move on to the torsion bars next.
![[IMAGE]](http://www.darrylsgarage.com/914/914-20-245.jpg)
![[IMAGE]](http://www.darrylsgarage.com/914/914-20-246.jpg)
![[IMAGE]](http://www.darrylsgarage.com/914/914-20-247.jpg)
![[IMAGE]](http://www.darrylsgarage.com/914/914-20-248.jpg)
![[IMAGE]](http://www.darrylsgarage.com/914/914-20-249.jpg)
Update 7/12/22 - Front Brake Installation Complete - The new paint finally cured and hardened enough for exposure to wheel bearing grease and brake fluid. I have the new wheel bearings installed, brakes completely reinstalled and new brake lines and braided steel hoses plumbed to the body. All that remains is plumbing the 2 new brake lines from the fender wells back to the master cylinder, bleeding the brakes, reinstalling the torsion bars, gas tank, fuel pump and protective belly pan currently getting powder coated.
![[IMAGE]](http://www.darrylsgarage.com/914/914-20-250.jpg)
![[IMAGE]](http://www.darrylsgarage.com/914/914-20-251.jpg)
![[IMAGE]](http://www.darrylsgarage.com/914/914-20-252.jpg)
![[IMAGE]](http://www.darrylsgarage.com/914/914-20-243.jpg)
![[IMAGE]](http://www.darrylsgarage.com/914/914-20-244.jpg)
Update 7/11/22 - Steering Rack Protection Pan Off at Seattle Powder Coat - After pondering the location and how close it sits to the master cylinder and relocated fuel pump, it only made sense to spend the extra money and have the new Automobile Atlanta reproduction steering rack protective pan powder coated. I queried on the Porsche 914 Facebook page regarding the color and the consensus is a semi-gloss black like the engine tins so I went with the same 60% gloss powder paint color. It should be done in a week or so and I should be ready for it by that time. I have the rubber seals from 914 Rubber that go on the forward and trailing edges to seal it against the body from debris thrown up under the car.
![[IMAGE]](http://www.darrylsgarage.com/914/914-20-242.png)
Update 7/8/22 - All the Remaining Front End Restoration Parts Ready to Install - I removed the masking and laid out all the freshly painted front brake parts along with all the new parts that will be installed to wrap-up the front end restoration. I'll let the paint cure and harden a few days before finishing the work but I've got to say I'm very pleased with how everything is coming together.
![[IMAGE]](http://www.darrylsgarage.com/914/914-20-241.jpg)
Update 7/7/22 - Last Front Brake Parts Painted and Drying- Getting the old front brake rotors, calipers and dust caps prepped for paint and painted was today's task. Stripping the rotors using paint stripper was the quickest way to get them looking like new again. The brake calipers were just wire brushed with Brakleen and the dust caps were vapor honed. The hubs of the rotors were painted machine gray as before, the dust caps semi-gloss black and the calipers redone with Eastwood's Golden Cad 3-stage paint system as was done on the rear calipers. The wisps of red and green tint over the gold base coat is more art than science and I find I like the green tint more than the red and use more of it. We'll see how it looks once mounted on the car but I'm getting pretty good at using the product.
![[IMAGE]](http://www.darrylsgarage.com/914/914-20-237.png)
![[IMAGE]](http://www.darrylsgarage.com/914/914-20-237.jpg)
![[IMAGE]](http://www.darrylsgarage.com/914/914-20-238.jpg)
![[IMAGE]](http://www.darrylsgarage.com/914/914-20-239.jpg)
![[IMAGE]](http://www.darrylsgarage.com/914/914-20-240.jpg)
Update 7/5/22 - Ready for Wheel Bearings and Brake Calipers- I wrapped-up installing the ball joints by installing and torquing down the tapered pins that are driven into the base of the strut housing to engage with a groove in the ball joint shaft and held in place with an M8 Nyloc nut. I also installed the rubber bushings into the sway bar drop links and bolted them on the car. Finally the brake rotor backing plates were installed, at least temporarily, just to enjoy how it looks all together but will probably be easier to install the new brake hoses without them on. Now to clean and repaint the brake rotor hubs gray and replace the wheel bearings as well repaint the brake calipers with Eastwood's Golden Cad system and then it's time to run the new brake lines and get those wheels back on and the car off the lift!
![[IMAGE]](http://www.darrylsgarage.com/914/914-20-233.jpg)
![[IMAGE]](http://www.darrylsgarage.com/914/914-20-234.jpg)
Update 7/4/22 - New Bilstein Struts, Ball Joints and Tie Rods Installed - I installed the new ball joints in the A-arms and snugged them up so they're ready to be torqued to 180 foot pounds once I have the weight of the car on them. Torquing the new Bilstein strut inserts into their housings required a special tool I purchased from Sierra Madre Collection to torque them to 100 foot pounds on my bench vise. I also installed the new tie rods and have them bolted in finger tight until after I install the new brake lines so I can move the yet to be bolted-in steering rack around to access the master cylinder. I still need to insert the tapered pins that secure the ball joint to the strut housing too. I'm pretty excited to have it so close to inserting the torsion bars and brake calipers so the car can roll again.
![[IMAGE]](http://www.darrylsgarage.com/914/914-20-228.jpg)
![[IMAGE]](http://www.darrylsgarage.com/914/914-20-229.jpg)
![[IMAGE]](http://www.darrylsgarage.com/914/914-20-230.jpg)
![[IMAGE]](http://www.darrylsgarage.com/914/914-20-231.jpg)
![[IMAGE]](http://www.darrylsgarage.com/914/914-20-232.jpg)
Update 7/3/22 - New Front Sway Bars Installed - I had a few hours to work on the 914 and got the front sway bar installed. Boiling water softened the bushings and I installed the left side on my workbench using the vise and deadblow hammer, pushing as much of the bar through as I could to make plenty of room for installing the right side bushing on the car. Once the brackets were tightened down on both sides and experimenting first with a deadblow hammer, it ended up taking several extremely hard blows with a sledge hammer to get the bar to center equally on both sides. The arms bolted on with 3 mm of the bar protruding through the ends as per the manual and it rotates easily by hand thanks to a little glycerine lube.
![[IMAGE]](http://www.darrylsgarage.com/914/914-20-227.png)
Update 7/2/22 - New Front Suspension Assembly Installed - Assembly of the A-arms into the suspension crossmember used the same 5/8" threaded rod and washer tool that was used to install the rubber bushings. I used the threaded rod to seat the rear bushing carriers completely into the crossmember and then later to do the final bushing compression once in the car to pull the front bushing carriers back into position for bolting. The rubber bushings seem to relax and larger gaps than desired between the carriers the A-arms results once they sit and cool down. The threaded rod fit easily into the crossmember using a standard 5/8" washer and it was easy to snug the bushings back into place with the crossmember bolted into the car, lining-up the front bushing carriers with the bolt holes in the mounts. I also figured what better time to locate and drill the missing holes in the steering rack protection pan (it come without them) while the suspension assembly was sitting on the table instead of waiting until it's mounted in the car. I laid some beams across the 4-post lift and covered them with a moving blanket to provide a support while positioning the suspension assembly by myself. Taking the time to "clock" all 4 bushing carriers while they were still hot from the boiling water bath to the same angles as they were when I removed the assembly from the car really paid off with everything lining up when installing the front bushing carrier mounting bolts. All brand-new gold cadmium plated hardware really pops against the fresh semi-gloss black and gloss red paint! I think installing the sway bar before the strut/spindle housings is the logical next step. I also think it's best to wait and torque the new ball joints once the weight of the car is on them so I'll just install them snug for now.
![[IMAGE]](http://www.darrylsgarage.com/914/914-20-221.jpg)
![[IMAGE]](http://www.darrylsgarage.com/914/914-20-222.jpg)
![[IMAGE]](http://www.darrylsgarage.com/914/914-20-223.jpg)
![[IMAGE]](http://www.darrylsgarage.com/914/914-20-224.png)
![[IMAGE]](http://www.darrylsgarage.com/914/914-20-225.jpg)
![[IMAGE]](http://www.darrylsgarage.com/914/914-20-226.jpg)
Update 6/30/22 - New Front Suspension Bushings Installed - Today's task was finally reassembling the front A-arms with new rubber bushings in their carriers. I purchased the bushings and installation tools from 914 Rubber and purchased a 5/8" diameter by 3 foot long threaded rod with washers, nuts and a long coupler nut to do the job. I've seen many ways to approach the problem on YouTube videos and gleaned the best practices to come up with my own method. I started by putting the rubber bushings in the freezer overnight and heating the carriers in boiling water using expansion and contraction for inserting the bushings into their carriers using a dead-blow hammer and my bench vice to get them seated all the way. I wanted to avoid using soap on the carrier side so they would not want to move as I was pushing them onto the A-arms. Once the bushings were in the carriers, I put each of the four assemblies in boiling water to soften the rubber as much as possible. Then with the threaded rod and washers set to utilize the installation tools for each bushing, I soaped the outside of the A-arm ends and insides of the bushings before using my pneumatic impact gun to tighten the coupler nut down the threaded rod with the other end double-nutted and held in place with a large vice grip. Pictures make it easier to understand and the end result was successful installation of the bushings but the boiling water damaged the black paint on the carriers. Easy enough, since I still had my temporary paint booth set up, I simply masked off the bushing carriers and placed the A-arms in plastic trash bags to mask them for painting. Now they're both drying and awaiting insertion into the crossmember and bolting them into the car. I will probably need to use the threaded rod technique again to fully seat the bushings when it comes time to bolt in the front carriers since they seem to spread apart when the bushings are not under compression.
![[IMAGE]](http://www.darrylsgarage.com/914/914-20-216.png)
![[IMAGE]](http://www.darrylsgarage.com/914/914-20-217.png)
![[IMAGE]](http://www.darrylsgarage.com/914/914-20-218.jpg)
![[IMAGE]](http://www.darrylsgarage.com/914/914-20-219.jpg)
![[IMAGE]](http://www.darrylsgarage.com/914/914-20-220.jpg)
Update 6/29/22 - New Steering Rack Boots Installed / Painting Done - Talk about a thumb strength challenging task, installing new rubber boots over the steering rack arms has to be one of the most challenging ones I've done. Everything else is cleaned up and ready to reassemble the front suspension now. In the obsessing over details department, I also did a little JB Weld rust pit and scrape repair on the torsion bar guards and gave them a coat of the same semi-gloss black paint as everything else. Painting the front wheels and almost forgotten about sway bar drop links was the last of the painting that needs the temporary paint booth and soon it can be dismantled and put away.
![[IMAGE]](http://www.darrylsgarage.com/914/914-20-212.png)
![[IMAGE]](http://www.darrylsgarage.com/914/914-20-213.png)
![[IMAGE]](http://www.darrylsgarage.com/914/914-20-214.png)
![[IMAGE]](http://www.darrylsgarage.com/914/914-20-215.png)
Update 6/24/22 - Ready to Start Front Suspension Reassembly - I let the freshly painted front suspension parts cure for 48 hours in the 84 degree heated shop before handling them and now they sit ready to start reassembly. The finish turned out flawless with no thin spots or blemishes from poor adhesion to the metal. The first task will be installing the new rubber A-arm bushings by heating them in boiling water and using lots of dish soap to slide them on with a special tool I'm fabricating.
![[IMAGE]](http://www.darrylsgarage.com/914/914-20-211.jpg)
Update 6/22/22 - Painting of the Front Suspension Components Complete - After taking a week off because my sister and her husband were in town visiting from Colorado and making my wife happy with some hard labor on the garden, I was eager to get back to work so over the last couple days I finished painting all the front suspension components. Before anything, I did some fitting of the better rear torsion bar bushing carriers I purchased off eBay with the old crossmember so they would slip right in without any resistance when I'm mounting the new A-arms into the car. Surprisingly that took a lot more cleaning-up with my die grinder than I thought it would because the old ones were so out of round that corrosion built up in the void between them and crossmember. The painting task starts with a fresh vapor honing to remove the residue from the corrosion inhibiting protective spray down I gave each part to keep it from flash rusting weeks ago when I did the initial stripping of paint and rust. Then a bath in carburetor cleaner of the wet part to displace the water used to rinse the blasting media off of them before they can flash rust followed by drying each part thoroughly with a heat gun to evaporate any remaining moisture from seams and such. Next wire brushing each part on the drill press with a big wire wheel and a small one on a Dremmel tool in the nooks and crannies where the big wire wheel can't reach. The final step before painting is a bath in brake cleaner solvent that leaves no residue (I save the $80/gallon wax remover/degreaser for the places painted red). This leaves the parts nice and shiny with just enough "scuffing" to give the paint a good surface for a mechanical bond in addition to the chemical bond. Finally 2 heavy coats of Dupli-Color Ford Semi-Gloss Black Engine Enamel in my temporary overspray-free paint boot with a 7 minute wait between coats to allow the paint to flash. Now I just have to let the paint harden and cure a couple days before I can start reassembly and get those front tires back on the ground so I can roll the car off the 4-post lift. The shop was a balmy 85 degrees thanks to two oil-filled radiator style heaters cranked on high, which explains why I look a bit sweaty in the photos, the perfect temperature for getting the paint to flash quickly and cure nice and hard. My electric bill will look like I'm up to something illegal out in the barn since it has its own power meter!
![[IMAGE]](http://www.darrylsgarage.com/914/914-20-202.jpg)
![[IMAGE]](http://www.darrylsgarage.com/914/914-20-203.jpg)
![[IMAGE]](http://www.darrylsgarage.com/914/914-20-204.jpg)
![[IMAGE]](http://www.darrylsgarage.com/914/914-20-205.jpg)
![[IMAGE]](http://www.darrylsgarage.com/914/914-20-206.jpg)
![[IMAGE]](http://www.darrylsgarage.com/914/914-20-207.jpg)
![[IMAGE]](http://www.darrylsgarage.com/914/914-20-208.jpg)
![[IMAGE]](http://www.darrylsgarage.com/914/914-20-209.jpg)
![[IMAGE]](http://www.darrylsgarage.com/914/914-20-210.jpg)
Update 6/11/22 - My Fourth (and Last) Spiel Article was Published - Check out my last article in a series of four about my winter project in my local Porsche Club of America chapter's monthly magazine. This one wraps-up my series about getting the rear of the car ready for a new engine. When I started in September, the back end of the car was the scope of the project. The supply chain delays on getting the engine rebuilt opened the opportunity to do the front end as well so the project has progressed to the front as the title of the article indicates. What's remarkable about this particular article is that it was "promoted" to the status of a "feature story" instead of just being off-season filler for the "Concours Corner" column. I learned an important lesson from writing these, never do a series while still working on the car instead of after it's all finished. Having material to write about really lit a fire under me to make progress instead of my normal mode of only working on it when I was in the mood! I know everybody loves a good "before and after" photo and this article dedicated 4 whole pages printed in color with huge photos to capture the dramatic makeover. Whoever says a car is only new once has never experienced the joy (and folly) of restoring an old car to its former glory.
![[IMAGE]](http://www.darrylsgarage.com/914/May2022Spiel.jpg) Link to May 2022 Spiel Article
Link to May 2022 Spiel Article
![[IMAGE]](http://www.darrylsgarage.com/914/914-20-235.jpg)
![[IMAGE]](http://www.darrylsgarage.com/914/914-20-236.jpg)
Update 6/10/22 - Reassembly Begins with the Front Turn Signals and Side Marker Lights - Over the last week I've restored the front turn signals and side marker lights by vapor honing them with very fine grit glass beads (basically just the worn out 80-grit I started with months ago that's ready for replacement) and clear coated them to protect the pot metal surfaces from oxidation. The insides of the turn signals were "re-silvered" using Dupli-Color's "chrome" colored rattle can paint. New rubber boots and grafting in new wires and heat shrink casing for the side marker lights using correctly color coded wires harvested from an old 912 wiring harness I've hoarded in my parts stash made everything look nice and new when I installed them today. I also installed proper gold cadmium plated base plates and button head bolts for the headlight pivots so everything looks new and correct. 914Rubber provided all the parts for this project and the quality is first rate.
![[IMAGE]](http://www.darrylsgarage.com/914/914-20-197.jpg)
![[IMAGE]](http://www.darrylsgarage.com/914/914-20-198.jpg)
![[IMAGE]](http://www.darrylsgarage.com/914/914-20-199.jpg)
![[IMAGE]](http://www.darrylsgarage.com/914/914-20-200.jpg)
![[IMAGE]](http://www.darrylsgarage.com/914/914-20-201.jpg)
Update 6/4/22 - Masking Removed Time to Step Back and Appreciate My Work - Yesterday I carefully removed all the masking tape to reveal the steering rack, brake master cylinder and all the nooks and crannies nobody but me will ever see. I touched-up areas on the original paint like the inside lips of the fenders where the tires had rubbed to really clean up the look. Now this morning I'm doing floor creeper yoga to get this photo. I'm finally at the point where I can start bolting new and refinished parts back onto the car, or as I like to call it, "the pay-off to all those hours of working in a coal mine". The remarkable thing is how exactly this fresh Sunrise Red matches the paint sprayed on the car 30 years ago in 1992. Using a single LED lamp shows the match whereas using the flourescent overhead lights and the LED lamp produces two different colors. This red is a very strange color to photograph in the sunlight as it looks to have a more pink tint than orange in certain lights that only the camera sees.
![[IMAGE]](http://www.darrylsgarage.com/914/914-20-193.jpg)
![[IMAGE]](http://www.darrylsgarage.com/914/914-20-194.jpg)
Update 6/3/22 - Sunrise Red Sprayed on Front Underside - After letting the SEM Self-Etching Primer cure and harden for 2 days, today it was finally time for the red paint. I thoroughly scuffed all the black primer with a 320-grit ScotchBrite pad prior to a wipe-down with prep solvent (wax/grease remover) using microfiber cloths before then wiping any lint off with a microfiber tack cloth. Spraying the undersides of the wheelwells and the bellypan of the car using my unwieldly paint gun without overspray or drips on the sections that really matters, the inner wheelwells that are visible presented a challenge. My solution was to mask it off using wide, heavy-duty aluminum foil in such a way that I could easily remove it once I got the other sections painted and they were still wet. It worked like a charm, revealing ready-to-paint surfaces. The paint flowed great and before long I was done and cleaning up the paint gun. As the photos show, the new red paint went on great and once the masking over the outer fender was removed, revealed a perfect match to the 30-year-old paint on the topside of the car. I used some medical IV line tape on my face to keep the red paint off the gap between my nostrils and mask, bags under my eyes and top of my nose with great results, however removing it was like ripping off a bandaid!
![[IMAGE]](http://www.darrylsgarage.com/914/914-20-182.jpg)
![[IMAGE]](http://www.darrylsgarage.com/914/914-20-183.jpg)
![[IMAGE]](http://www.darrylsgarage.com/914/914-20-184.jpg)
![[IMAGE]](http://www.darrylsgarage.com/914/914-20-185.jpg)
![[IMAGE]](http://www.darrylsgarage.com/914/914-20-186.jpg)
![[IMAGE]](http://www.darrylsgarage.com/914/914-20-187.jpg)
![[IMAGE]](http://www.darrylsgarage.com/914/914-20-188.jpg)
![[IMAGE]](http://www.darrylsgarage.com/914/914-20-189.jpg)
![[IMAGE]](http://www.darrylsgarage.com/914/914-20-190.jpg)
![[IMAGE]](http://www.darrylsgarage.com/914/914-20-191.jpg)
![[IMAGE]](http://www.darrylsgarage.com/914/914-20-192.jpg)
Update 5/31/22 - Seam Sealing Caulk and Self-Etching Primer Complete - All the weeks of work stripping the undercoat and paint to bare metal, removing the factory seam sealing caulk prospecting for rust, the bodywork on the lap-welded patches made to the back bottoms of the wheelwells, pounding out dents and smoothing out surface rust pitting before applying new seam sealing caulk are now done. The time came to finally mask the car off and prepare it for an ample coat of SEM Self-Etching Primer. I used a full head sock this time to keep the paint out of my beard where it gets sucked in under my resperator mask and it worked great even if I did look like I was sprouting a horn due to where the seam is sewn. It took a full three cans of primer and two full tubes of seam sealing caulk to replicate amount applied by the factory. I was lucky, no runs anywhere. The front edge of the spare tire well on the belly pan had some deep dents which I pounded out as well as I could with a hammer and dolly but since they're covered by the front apron, I decided not to do any bodywork on them. Now to let the primer set and cure for 48 hours before a light scuffing with a 320-grit ScotchBrite pad, wipe-down with prep-solvent (grease/wax remover), wipe with a tack rag and finally painted with Sunrise Red enamel.
![[IMAGE]](http://www.darrylsgarage.com/914/914-20-172.jpg)
![[IMAGE]](http://www.darrylsgarage.com/914/914-20-173.jpg)
![[IMAGE]](http://www.darrylsgarage.com/914/914-20-174.jpg)
![[IMAGE]](http://www.darrylsgarage.com/914/914-20-175.jpg)
![[IMAGE]](http://www.darrylsgarage.com/914/914-20-176.jpg)
![[IMAGE]](http://www.darrylsgarage.com/914/914-20-177.jpg)
![[IMAGE]](http://www.darrylsgarage.com/914/914-20-178.jpg)
![[IMAGE]](http://www.darrylsgarage.com/914/914-20-179.jpg)
![[IMAGE]](http://www.darrylsgarage.com/914/914-20-180.jpg)
![[IMAGE]](http://www.darrylsgarage.com/914/914-20-181.jpg)
Update 5/27/22 - First Look at My Wheelwell Bodywork in Primer - After finally getting the thin skim coat of glazing putty block sanded out on both sides without any sand-thru to bare metal, I hit it with a coat of primer to see any flaws I couldn't feel. Overall I'm pretty happy with how it's turning out considering the mess I had to fix on the left side from the body shop's kludge repair and squared-off bottom corner. How they could fix one side so perfectly and screw up the other is beyond me. The left side is still slightly more squared-off than the right but at least the spot weld flange is curved to match the right side. It took me 30 years to notice the kludge repair so I doubt the casual observer will once they're painted red and the tire is filling the space. Next I'll use red oxide spot putty over the primer to fix the few defects I missed, block sand it out and respray with primer. I'm also ready to start applying the 3M seam sealing caulk to replace all the factory caulk I removed in the hunt for rust. I'm actually quite pleased at how little rust I found considering the longitudinal channels were so rusted. The car must have been driven on the beach and the rocker covers filled with salty sand in order to rot out the bottoms of the channels like they were. Overall the body shop did a great job welding in the new longitudinal panel pressings with the one exception of the left front corner. It makes me wonder if more than one guy worked on it and the more skilled older Romanian craftsman I was familiar with got pulled off on a more urgent job... 30 years ago, he's probably dead by now.
![[IMAGE]](http://www.darrylsgarage.com/914/914-20-169.jpg)
![[IMAGE]](http://www.darrylsgarage.com/914/914-20-170.jpg)
Update 5/26/22 - I'm done stripping paint for good! - With the completion of the left front wheelwell and steering rack area, all the original blue metallic paint has been removed from the car. I cleaned-up the steering rack in place since removing it would require removing the master cylinder and that's opening up a can of worms I really don't want the scope of this restoration project to creep into. By capping the metal brake lines for the front calipers (which will be replaced with new ones) with plugs I made by soldering shut the holes in the old brake hose fittings, I could keep the brake system sealed and brake fluid kept in all the components. The steering rack will be masked off and the paint sprayed in around it, which should be fine considering the area is covered by a protective belly pan. All the surface rust has been cleaned out, neutralized and the pits filled with JB Weld which will be sanded down flush with the surface. Next steps will be finishing out the block sanding of the glazing putty on the repairs to the lower rear areas of the wheelwells and applying fresh seam sealing caulk in the areas the factory seam sealer has been removed to check for and neutralize any rust.
![[IMAGE]](http://www.darrylsgarage.com/914/914-20-167.jpg)
![[IMAGE]](http://www.darrylsgarage.com/914/914-20-168.jpg)
Update 5/13/22 - Right Front Wheelwell is All Bare Metal! - I finally have all the rubberized undercoating and blue paint off the entire underside on the right side. I have about a day's worth of work on the left side remaining to get it in a similar condition. I'm finally starting to see the end in sight!
![[IMAGE]](http://www.darrylsgarage.com/914/914-20-171.jpg)
Update 5/10/22 - Lab-metal Filling to Hide Lap-weld Seams Done! - The lap-weld technique used by the body shop to provide new sheetmetal caps to anchor the new inner and outer longitudinal channel sheet metal pressings would have never won a beauty contest. The engineering is sound though, the lap-welds and additional rosette welds on the inside secure about a 1" overlap between the original body sheet metal and the new metal which was welded like a ladder on both the inside and outside, producing an extremely strong joint. That's critically important on a targa body since those longitudinal channels support the entire weight of the car. Hiding the ugly weld visible on the outside face of the wheelwell without weakening the seam required very minimal grinding to the weld beads to level them and a lot of "gentle" hammering to make the area slightly recessed so filling with Lab-metal would only require a minimal strip about 2" wide and less than 1/16" thick. The first task was making sure all the seam sealing caulk was removed from the weld seam by using my spot sandblaster. Then the first application of Lab-metal was made to level the depressed area centered on the seam. Lab-metal is used right out of the can with no hardening catylist and is "troweled" on like cement. The most difficult issue is Lab-metal can't be smoothed with a plastic spreader, rather smoothed with Lab-solvent with my finger in a rubber glove so it's applied thick and it requires 24 hours to harden, shrink and fully cure before a lot of sanding so the going was very slow. The second application was made to cover the entire patch panel with the filler thinned with Lab-solvent, like painting it on to fill any of the sanding and hammer marks and again hammering or Dremmel tool grinding down any high spots in the sheet metal or weld beads. Once the Lab-metal was completely done with sanding to shape it, especially at the bottoms of the panels by the spot weld flanges it was clear that the feathering qualities of the product are limited and that red oxide spot putty would be required to hide the transition points where the Lab-metal meets the sheetmetal. I covered the entire area with red oxide putty and will begin slowly block sanding the area out trying to keep the putty layer as thin as possible. A coat of self-etching primer to the area will be the next step to be able to see how smoothly the transitions will appear once painted and repeat with the red oxide spot putty where necessary. The last thing I want is to build up the surface with soft putty filler that will surely crack when hit by rocks from the tires.
![[IMAGE]](http://www.darrylsgarage.com/914/914-20-159.jpg)
![[IMAGE]](http://www.darrylsgarage.com/914/914-20-160.jpg)
![[IMAGE]](http://www.darrylsgarage.com/914/914-20-161.jpg)
![[IMAGE]](http://www.darrylsgarage.com/914/914-20-162.jpg)
![[IMAGE]](http://www.darrylsgarage.com/914/914-20-163.jpg)
![[IMAGE]](http://www.darrylsgarage.com/914/914-20-164.jpg)
Update 5/5/22 - Rework on the Left Rear Wheelwell Bottom Done! - Removing all the seam sealing caulk and undercoating from the front wheelwells revealed something I hadn't noticed in the 30 years since the bodyshop installed new longitudinal channels on the car. They fabricated large patch panels to cap the front ends of the longitudinal channels which were lap welded into place leaving the seam and tack welds visible on both sides. The spot weld flange on the right side was done to mimic the original curved corner but on the left side they got lazy and just boxed it off. I cut out the square corner, fabricated a curved 1/2" inside flange and welded it to the floor pan and then fabricated a rounded corner with a flange to match the right side out of a sheet of 20-gauge steel. Welding it in went without burning any holes in the metal and it quickly cleaned up to look almost perfect. The next step of the repair is using Lab-metal repair putty over the body shop's lap weld and to clean up the corner patch welds on both sides of the car. I must say it was reassuring to be able to look inside the longitudinal channel and see nothing but nice new sheetmetal.
![[IMAGE]](http://www.darrylsgarage.com/914/914-20-154.jpg)
![[IMAGE]](http://www.darrylsgarage.com/914/914-20-155.jpg)
![[IMAGE]](http://www.darrylsgarage.com/914/914-20-156.jpg)
![[IMAGE]](http://www.darrylsgarage.com/914/914-20-157.jpg)
![[IMAGE]](http://www.darrylsgarage.com/914/914-20-195.jpg)
![[IMAGE]](http://www.darrylsgarage.com/914/914-20-196.jpg)
![[IMAGE]](http://www.darrylsgarage.com/914/914-20-158.jpg)
Update 5/1/22 - My Third Spiel Article was Published - Check out my third article in a series of four about my winter project, the mechanical refresh of the 914 I've owned for 30 years in my local Porsche Club of America chapter's monthly magazine. It's all about the steps of making the bottom of the car look like brand new; stripping to bare metal, priming with self-etching primer and painting before installing parts that have been restored or ones that are brand new.
![[IMAGE]](http://www.darrylsgarage.com/914/Apr2022Spiel.jpg) Link to April 2022 Spiel Article
Link to April 2022 Spiel Article
Update 4/27/22 - The Left Sway Bar Mount is Welded In! - I wrapped-up the front sway bar mounts today with welding in the left side in a few hours since I already had everything figured out. Having a small 1/2" copper cap so I could use a C-clamp to close a gap between the lower outer bracket and body came in handy. Everything looks quite sanitary with no rosette welds visible once the rubber bushing brackets are bolted onto them. Now I've got the Lab-metal filler for covering the lap welds on the patch panels on the ends of the left and right longitudinal channels made by the body shop 30 years ago and hidden under a thick coat of seam sealer and undercoating. I'm pretty confident that I can level out the thickness of the patch over the original metal with a narrow strip of filler.
![[IMAGE]](http://www.darrylsgarage.com/914/914-20-150.jpg)
![[IMAGE]](http://www.darrylsgarage.com/914/914-20-151.jpg)
![[IMAGE]](http://www.darrylsgarage.com/914/914-20-152.jpg)
![[IMAGE]](http://www.darrylsgarage.com/914/914-20-153.jpg)
Update 4/26/22 - The Right Sway Bar Mount is Welded In! - The day started with making paper patterns of where the plug weld holes would be drilled into the body for the inner mount and into the outer mount. Everything progressed very well, the inner mount was held into place using copper washers to protect the bolt from weld slag. Five plug welds were made from the outside and good penetration was visible on the inner mount plate from the inside. Once the five plug welds were ground flush, the outer plate was drilled for nine plug weld holes and welded into place again using copper washers. The nine plug welds were ground flush using my die grinder and the gold cadnium plated sway bar bushing holder was bolted into place to confirm the no welds were visible once mounted like a factory mount. Tomorrow the left side should go quickly now that all the patterns are made and I know what I'm doing.
![[IMAGE]](http://www.darrylsgarage.com/914/914-20-145.jpg)
![[IMAGE]](http://www.darrylsgarage.com/914/914-20-146.jpg)
![[IMAGE]](http://www.darrylsgarage.com/914/914-20-147.jpg)
![[IMAGE]](http://www.darrylsgarage.com/914/914-20-148.jpg)
![[IMAGE]](http://www.darrylsgarage.com/914/914-20-149.jpg)
Update 4/23/22 - Everything is Down to Bare Metal, Time to Weld! - I really pushed hard to get all the original blue paint stripped, wire brushed down to the bare metal and ready for self-etching primer on Friday. Now I can clean up all the mineral spirits and aircraft paint stripper saturated newspapers and blue plastic tarp off the floor and set up for sparks flying from my MIG welder. Welding in the new front sway bar mounts should be a pretty easy job using rosette (plug) welds but careful measuring and drilling the holes will take a little time. I will also begin prepping the primative lap joint welds done by the bodyshop 30 years ago to cap the front ends of the new longitudinal channels for filling with Lab-Metal once the order arrives from Eastwoods. Vapor honing of the suspension parts is making good progress and I'm going to use aircraft stripper on the rust-free eBay sourced parts to speed up the process since they're still wearing the factory black paint. The weather forecast for the week is rainy and cool so it should be perfect for working in the shop.
![[IMAGE]](http://www.darrylsgarage.com/914/914-20-143.jpg)
![[IMAGE]](http://www.darrylsgarage.com/914/914-20-144.jpg)
Update 4/21/22 - All the New Front Suspension Parts Are Here! - That means it's time for another one of my trademark OCD-exposing parts laid out like a military dress inspection photos! All the bare metal vapor honed parts are ones off the car that I'm reusing so any other ones still painted black are the parts I harvested off eBay. I noticed the steering rack pan on my car was quite wrinkled at the forward mounting points and realized the mounting tabs on the suspension crossmember were quite bent. Before finishing vapor honing them I needed to straighten out those tabs without breaking them off. The suspension crossmember sat in the damp vapor honing cabinet overnight so it got quite a coat of flash rust that is easy to remove with a quick vapor honing. I fired-up the oxy/acetylene torch and heated the mounting tabs red hot so a little gentle prying straightened them right back up. I decided to invest in a new reproduction steering rack pan from Automobile Atlanta instead of trying to repair the old one. After vapor honing all the parts I'm using off the car it was time for organizing all the parts to make sure I didn't forget anything, especially all the new gold cadmimum plated hardware from Belmetric. I'm really getting excitied about getting closer to painting the underside of the car red and made good progress on stripping the black undercoating off the underside of the trunk by the tow hook and under where the spare tire lays while waiting for my air compressor to recover between vapor honing sessions.
![[IMAGE]](http://www.darrylsgarage.com/914/914-20-142.jpg)
![[IMAGE]](http://www.darrylsgarage.com/914/914-20-139.jpg)
![[IMAGE]](http://www.darrylsgarage.com/914/914-20-140.jpg)
![[IMAGE]](http://www.darrylsgarage.com/914/914-20-141.jpg)
Update 4/19/22 - Front Sway Bar Mounts Ready to Weld In - Drilling the holes for the captive nuts on the front sway bar mounts is a relatively simple procedure, following the detailed instructions provided by the manufacturer, Brad Mayeur at 914 Limited. Where the instructions directed me to use a punch to mark the holes and drill quickly bacame unrealistic since there's no way a drill can fit into the confined area next to the front bulkhead. I also wanted to make precise holes, not approximated ones where enlarging them would be required to get the bolts to go in. I thought about it and decided to make a tool out of an M8 bolt that would allow me to bore the pilot holes using a carbide tipped boring bit on my Dremmel tool. Since Dremmel bits are 1/8" in diameter, I used my drill press to drill an 1/8" hole in the exact center of a short M8 bolt. Then with a lock nut, the bolt is inserted into the captive nut on the sway bar mount and the Dremmel tool easily bores a perfectly located pilot hole inside the car which can be enlarged to 3/16" from the outside to allow using a step bit to enlarge the hole to 3/8" or 11/16" depending on the location. The 1-1/4" diameter center hole for the actual sway bar was done with a bi-metal blade hole saw. Everything lined-up perfectly and I used the new gold cad plated sway-bar bushing brackets to do the left and right test fitting. Now everything is ready for welding, which I plan to do using rosette (plug) welds after drilling holes in the body for the inner and in the mount for the outer, welding and grinding so they're hidden under the gold cad plated part giving the impression of a factory installation since these were spot welded in. I also broke out the MAPP gas torch and removed the old rubber bushings and their carriers from the "new" A-arms with the sway bar drop link tabs to prepare them for vapor honing. I've kept the rusty old A-arms assembled to reference the angles of the bushing carriers to make reinstalling them in the car as easy as possible. All the parts required to reassemble the front suspension have now arrived and I have no worries about being held-up by supply chain issues. Working with the garage door open and enjoying the fresh spring air and birds singing made for a very pleasant day spent in the shop but all the stooping over the car will make it a 3 ibuprofen day tomorrow for sure!
![[IMAGE]](http://www.darrylsgarage.com/914/914-20-131.jpg)
![[IMAGE]](http://www.darrylsgarage.com/914/914-20-132.jpg)
![[IMAGE]](http://www.darrylsgarage.com/914/914-20-133.jpg)
![[IMAGE]](http://www.darrylsgarage.com/914/914-20-134.jpg)
![[IMAGE]](http://www.darrylsgarage.com/914/914-20-135.jpg)
![[IMAGE]](http://www.darrylsgarage.com/914/914-20-136.jpg)
![[IMAGE]](http://www.darrylsgarage.com/914/914-20-137.jpg)
![[IMAGE]](http://www.darrylsgarage.com/914/914-20-138.jpg)
Update 4/15/22 - Another Day in the Coal Mine! - I got the left wheelwell stripped to bare metal to match the right one. Here's the steps starting with the dirty 30-year-old rubberized undercoating covering the original light blue metallic paint. Next the rubberized undercoating soaked and scrubbed with mineral spirits to make it brittle enough to scrape and wire brush off with a drill mounted wheel exposing the original light blue metallic paint. Next aircraft paint stripper bubbling the original paint prior to being scraped off with a plastic BONDO spreader. Finally bare metal scuffed with a wire wheel and ready for self-etching primer as well as removing the factory seam sealing caulk around the upper shock mount recess seam. These photos reflect a solid 8 hours of work.
![[IMAGE]](http://www.darrylsgarage.com/914/914-20-130.jpg)
![[IMAGE]](http://www.darrylsgarage.com/914/914-20-129.jpg)
![[IMAGE]](http://www.darrylsgarage.com/914/914-20-128.jpg)
![[IMAGE]](http://www.darrylsgarage.com/914/914-20-127.jpg)
Update 4/14/22 - Back in the Coal Mine! - I'm considering joining the coal miner union, I'm back down there again. Stripping the undercoating with mineral spirits and metal scrapers and then using Aircraft Paint Stripper and plastic scrapers to remove the paint made great progress yesterday. The shop looks like a crime scene but that's the nature of this messy work. I uncovered the rust repair work to the bottom rear corner done by the body shop 30 years ago under an extremely thick layer of seam sealer caulk and undercoating. The seam around the replacement panel is lap welded and will require some bodywork to hide it properly. Super hard Lab-Metal filler should do the job since this area will get a lot of rock impacts. The good thing is there's zero rust. I've also ordered all new mounting hardware for the front shock struts and tie rods, and a new steering rack cover pan since the old one was so damaged.
![[IMAGE]](http://www.darrylsgarage.com/914/914-20-125.jpg)
![[IMAGE]](http://www.darrylsgarage.com/914/914-20-126.jpg)
Update 4/12/22 - The Front Suspension is Out and Disassembled! - Tonight the 914 sits with a "naked" front end on the 4-post lift. Yesterday my wife helped me remove the front bumper and apron and I also pulled the gas tank. Today I got the suspension off and taken apart as well as the turn signals, side marker lights and radio antenna removed. The old right torsion bar won't be going back in as there was some rubbing on it and I've already ordered an excellent condition used one from one of my favorite eBay sellers "mattman1955". The torsion bar tubes on the A-arms were so full of rusty crust I couldn't pull the torsion bars out before dumping the contents on the floor! It's a good thing to have a HUGE workbench vise for jobs like this. I called my 914 guru Rich Bontempi at High Performance House regarding ordering Bilsten shock inserts to replace my BOGE ones and he doesn't carry them since they are available at so many sources. I went ahead ordered a pair from PMB Performance after talking to Holly at the sales desk to confirm the correct gland nuts came with the set. I then ordered a Bilstein gland nut wrench from Sierra Madre Collection as well. I was going to remove the steering rack but realized that would require removing the brake master cylinder and I'd rather avoid that can-of-worms if I can. I'm already planning on replacing all the brake lines between the master cylinder and front calipers so bending the old ones out of the way while I'm repainting should give me planty of room to work. I also ordered a new pair of complete tie rods instead of messing with the old rusty ones since I needed to replace the left tie rod end anyway, the additional cost wasn't that great. Now it's time to get out the mineral spirits, brushes and pressure wand and get start stripping away that old undercoating as the next step.
![[IMAGE]](http://www.darrylsgarage.com/914/914-20-120.jpg)
![[IMAGE]](http://www.darrylsgarage.com/914/914-20-121.jpg)
![[IMAGE]](http://www.darrylsgarage.com/914/914-20-122.jpg)
![[IMAGE]](http://www.darrylsgarage.com/914/914-20-123.jpg)
![[IMAGE]](http://www.darrylsgarage.com/914/914-20-124.jpg)
Update 4/10/22 - BOGE Front Strut Inserts Found! - I tore into the front suspension after draining the gas tank on the 914. All the large mounting bolts for the torsion bars came loose easily with my impact gun so there will be no drama with rusted bolts. The brake calipers still look great as they were replaced with rebuilt ones not that many miles ago but probably 20 years ago. I had also replaced the right tie rod end about the same time period so only the left one was a challenge with a rusted cotter pin and the need to use the Dremmel tool to cut the castellated nut down and use the tie rod puller and MAPP torch to heat it up. The ball joints put up very little fight against my pickle fork and big hammer and it wasn't long before I put a new spanner to use opening up the front struts to remove the inserts. The inserts still look like new and are clearly marked "BOGE" so I can call my 914 guru Rich Bontempi at High Performance House in California and see if he has the proper Bilstein strut inserts in stock as he would know which retaining nut would go with them and have those too. Now I need to remove the front bumper, front apron and gas tank to get at the front torsion bar mounts and the rack-and-pinion steering unit for further disassembly. The steering unit looks a little tired to I've ordered new rubber boots and spring clamps for it from Pelican Parts as well as new steel brake lines from the master cylinder to the calipers from PMB Performance. The brake disc backing plates are also deeply rusted so I found a better set on eBay and have them on the way. Disassembling the front torsion bars is the next step once I can get to them.
![[IMAGE]](http://www.darrylsgarage.com/914/914-20-114.jpg)
![[IMAGE]](http://www.darrylsgarage.com/914/914-20-115.jpg)
![[IMAGE]](http://www.darrylsgarage.com/914/914-20-116.jpg)
![[IMAGE]](http://www.darrylsgarage.com/914/914-20-117.jpg)
![[IMAGE]](http://www.darrylsgarage.com/914/914-20-118.jpg)
![[IMAGE]](http://www.darrylsgarage.com/914/914-20-119.jpg)
Update 4/6/22 - Turned Around on the 4-Post Lift! - I took advantage of good weather and having access to the 4-post lift and changed the oil on my '74 911 and '89 Carrera over the last week. Then I turned the 914 around outside, winched it backwards onto the 4-post lift and jacked it up using the bridge jack from the lifting points on the floorpan just behind the back of the wheelwells. Now I'm ready to start taking it all apart, draining the gas tank and removing it to access the mounting points for the new front sway bar installation. I need to get access to the shock strut inserts to find out if they're Boge or Bilstein and order the appropriate ones ASAP so I'm not held up by some supply chain issue. I'm currently having problems finding Chevron Delo diesel motor oil for my boat so supply chain issues are real.
![[IMAGE]](http://www.darrylsgarage.com/914/914-20-109.jpg)
![[IMAGE]](http://www.darrylsgarage.com/914/914-20-110.jpg)
![[IMAGE]](http://www.darrylsgarage.com/914/914-20-111.jpg)
![[IMAGE]](http://www.darrylsgarage.com/914/914-20-112.jpg)
Update 3/29/22 - Wheels Back on the Ground! - Bleeding the brakes and adjusting the parking brake cables today wraps-up 4 solid months of work cosmetically and mechanically restoring the rear and upgrading the suspension of my 914. Now I'm declaring it ready for an engine. Supply chain issues and long machine shop queues have the engine rebuild delivery date in limbo. Meanwhile I'm going to turn the car 180 degrees on the 4-post lift and begin performing the same degree of restoration and suspension upgrade work on the front end.
![[IMAGE]](http://www.darrylsgarage.com/914/914-20-107.jpg)
![[IMAGE]](http://www.darrylsgarage.com/914/914-20-108.jpg)
Update 3/27/22 - Rear Brakes Ready to Bleed the Brake Lines! - After torquing the rear axles it was time to install the brake pads back into their original positions. The outboard pads would not go in without binding so it became clear that the new 5-bolt wheel hubs had changed the position of the brake discs relative to the caliper. Further investigation showed that what was actually happening was the caliper venting adjusters just needed to be readjusted to the new position. I've never done that before so I broke out the manual and followed it step-by-step to set the clearance between the rotor and brake pad to 0.2 mm with a feeler gauge. The left one took almost 3 hours yesterday afternoon to figure out with the aid of the workshop manual and the right one about 45 minutes today without needing the manual because I was an "expert" by now. The new hard and flexible brake lines were finally all hooked back into the lines at the engine mounting pods and tightened down so the next step is bleeding the air out of the brake lines. Last step once no leaks are found and the brake pedal is nice and hard will be adjusting the new parking brake cables and then putting the wheels back on and on the ground.
![[IMAGE]](http://www.darrylsgarage.com/914/914-20-105.jpg)
![[IMAGE]](http://www.darrylsgarage.com/914/914-20-106.jpg)
Update 3/25/22 - Rear Axles with NOS CV-Joints are Installed! - Today I finally got to use my Christmas present from my wife, my new 600 foot pound capacity torque wrench! I've lusted for one of these since working for my buddy Jack and using his similar but higher quality Snap-On torque wrench we used to call "Excalibur" around the shop. Mine is a Sunex brand, made in Taiwan but good enough quality for my frequency of use and sure was easy to click in the 225 foot pound spec and then the little more to get the cotter pin holes to line up. I used some super heavy-duty 48" zip-ties to suspend the axles from the rear springs so now the car can roll easily without the CV-joints flopping around. All that remains now is loading the brake pads into the calipers, hooking up the hydraulic brake lines and bleeding them and then adjusting the new parking brake cables and this car is ready for an engine in the back. Turning the car around and restoring the front wheelwells and installling the front sway bars and new Bilstein strut inserts will be the next phase while waiting for the engine to be completed.
![[IMAGE]](http://www.darrylsgarage.com/914/914-20-101.jpg)
![[IMAGE]](http://www.darrylsgarage.com/914/914-20-102.jpg)
![[IMAGE]](http://www.darrylsgarage.com/914/914-20-103.jpg)
![[IMAGE]](http://www.darrylsgarage.com/914/914-20-104.jpg)
Update 3/24/22 - Rear Axles with NOS CV-Joints Ready to Install - I finally had time to wrap up assembly of the rear axles with the NOS "Made in West Germany" CV-joints and they're ready to go into the car. CV-joints are funny little puzzles, they only go together one way and once I figured out the secret it was like watching Forrest Gump assemble his M-14! I used some old coffee can lids to make covers I zip-tied over the greasy open ends of the axles that will be hanging exposed under the car until the engine is ready to install. I wanted something a little cooler than sandwich bags for photos.
![[IMAGE]](http://www.darrylsgarage.com/914/914-20-100.jpg)
![[IMAGE]](http://www.darrylsgarage.com/914/914-20-99.jpg)
Update 3/20/22 - Wrong CV-joints from Porsche Classsic and Rear Sway Bar Installed - Assembly with all the new parts was down to the last step, the CV-joints and rear sway bar when I was burned by not closely inspecting the new CV-joints and assuming they were correct 6 months ago. Those expensive Porsche Classic CV-joints I was so excited about finding after being listed as NLA for decades were not made for the original axles! This is the thing that I find so frustrating about using the Porsche Classic PET (Porsche Elektronischer Teilekatalog) on the porsche.com website. If a part design has been superseded, there's no explanation or part number change to the last 2 digits! In this case Porsche Classic produces a new complete rear axle assembly (CV-joint to CV-joint) but instead of 33 splines on the axle shaft like original, there's only 25. Where the problem arises is that the individual CV-joints listed in the PET are for the replacement axle with 25 splines yet they don't sell the new 25 spline axle shaft by itself. Even more disappointing is Pelican Parts, the vendor I purchased them from were oblivious as to such a basic incompatibility and have a 30 day return policy. It's going to be years before the new complete axle assemblies wear out so what's the point of having replacement CV-joints available? Luckily I called my Dodge Cobra loving eBay Porsche parts guru Rich Bontempi at High Performance House in California. Not only did Rich educate me on the replacement CV-joint situation but also happened to have 4 "made in West Germany" NOS 33-spline CV-joints in stock! I'm not going to whine about how much money I have wrapped up in my CV-joints but rather focus on the positive, they have zero hours on them and life will be just that much more carefree! I went ahead and installed the restored rear sway bar and will finish with assembling and installing the rear axles in the next few days. Then I'll reconnect the brake lines, bleed the calipers and adjust the parking brake and call it "ready for an engine" before turning the car around and starting on the front.
![[IMAGE]](http://www.darrylsgarage.com/914/914-20-94.jpg)
![[IMAGE]](http://www.darrylsgarage.com/914/914-20-95.jpg)
![[IMAGE]](http://www.darrylsgarage.com/914/914-20-96.jpg)
![[IMAGE]](http://www.darrylsgarage.com/914/914-20-97.jpg)
![[IMAGE]](http://www.darrylsgarage.com/914/914-20-98.jpg)
Update 3/5/22 - Lower engine compartment ready for reassembly - The paint on the rear underside of my 914 project is FINALLY DONE! I spent the day removing the masking and touching up nooks and crannies my paint gun missed with a paintbrush. Now I can let the fresh paint cure and harden up a couple days before I start reassembly. Then it's flip the car 180 degrees on the 4-post lift and start on the front suspension and wheelwells.
![[IMAGE]](http://www.darrylsgarage.com/914/914-20-92.jpg)
![[IMAGE]](http://www.darrylsgarage.com/914/914-20-93.jpg)
Update 3/4/22 - Lower engine compartment is painted red - After letting the SEM Self-Etching Primer cure and harden for almost 3 days I scuffed it with a 320-grit Scotchbrite pad and shot the Mazda Sunrise Red. My buddy was right, the remaining paint from painting the back half did have a short shelf life and was completely hardened-up in the plastic jug so I had to have him mix up fresh quart to finish this area. I'll need to get another batch mixed up when it comes time to do the front wheelwells and hope there's enough left from the gallon (before adding reducer and hardener) I bought from him. Now I just need to let the paint harden and cure a couple days before removing all the masking and starting the final assembly with all the new brake lines, parking brake cables, engine and transaxle mounts and front engine compartment seal. I've got to say this took a lot longer than I expected, but then again, I work slowly and take my time until everything is perfect. Being retired, time is abundant and the cost is the same for materials whether I do a perfect job or sloppy one. I'll admit that I'm starting to burn out on removing paint to bare metal but the front end of the car is a lot less surface area since it's just the wheelwells.
![[IMAGE]](http://www.darrylsgarage.com/914/914-20-90.jpg)
![[IMAGE]](http://www.darrylsgarage.com/914/914-20-91.jpg)
Update 3/2/22 - My second Spiel article was published - Check out my second article in a series about my winter project, the mechanical refresh of the 914 I've owned for 30 years in my local Porsche Club of America chapter's monthly magazine. It's all about finding parts during a period of supply chain disruptions and how it was back in the day the first time I restored this car.
![[IMAGE]](http://www.darrylsgarage.com/Feb2022Spiel.jpg) Link to February 2022 Spiel Article
Link to February 2022 Spiel Article
Update 3/1/22 - Lower engine compartment masked and primed - After letting the 3M Seam Sealer caulk dry and harden for 2 days, today was time to mask and prime with SEM Self-Etching Primer. I used aluminum foil to cover the brake lines and cables as much as possible so it looked like a lot of shiny silver once ready for priming. I was able to lay down two fairly heavy coats without any runs or sags and the areas where I filled the pits along the bottom edge with JB Weld blend in well thanks to the thorough sanding to feather them out and not be a visible line. Now to let the primer cure and harden for 2 days before scuffing it all with 320-grit Scotchbrite pads and painting Mazda Sunrise Red.
![[IMAGE]](http://www.darrylsgarage.com/914/914-20-88.jpg)
![[IMAGE]](http://www.darrylsgarage.com/914/914-20-89.jpg)
Update 2/26/22 - All paint stripped and seam sealing caulk applied - Over the last 4 days I've stripped all the original paint off from the engine mount pods forward to the front engine compartment bulkhead with wire wheel brushes on my drill and Dremmel tool using no chemical paint stripper because of leaving the wiring and cables in place and not wanting to contaminate the points where masking is necessary. All the areas that were pocked with rust pits along the bottom edge of the front bulkhead have been treated with SEM Rust-Seal, filled with a thin layer of JB Weld and feather sanded out before applying 3M Seam Sealer caulk over all the places I removed the factory seam sealer caulk. I've cleaned everything with Brake-Kleen and started masking for the next step. SEM Self-Etching Primer. I'll let the seam sealing caulk dry and harden-up over the weekend and plan on masking and priming on Tuesday.
![[IMAGE]](http://www.darrylsgarage.com/914/914-20-86.jpg)
![[IMAGE]](http://www.darrylsgarage.com/914/914-20-87.jpg)
Update 2/22/22 - Undercoating stripped from engine compartment front bulkhead - Now that the 914's wheels are back on the ground, the bridge jack is out of the way and I was able to strip all the undercoating off the front bulkhead to reveal the original Marathon Blue Metallic paint. I was able to remove the two bolts holding the brake proportioning valve to the bulkhead which made it easier to get at the undercoating behind it. Next, to use wire wheels on my drill to get the remainder of the motor mount pods down to bare metal and prepping that blue paint for a coat of red.
![[IMAGE]](http://www.darrylsgarage.com/914/914-20-85.jpg)
![[IMAGE]](http://www.darrylsgarage.com/914/914-20-84.jpg)
Update 2/20/22 - Rear wheels ready to go on the ground - After blowing a seal and stopping my work early yesterday, today I swapped out the leaking 12-ton bottle jack in my shop press with another $29 Harbor Freight one like a burned-out lightbulb. I was able to finish pressing the wheel lugs out of the old hubs into the new 5-bolt hubs. Now I'm finally where I hoped to be yesterday, ready to put the wheels back on the ground, move the bridge jack out of the way and move forward with restoring the front of the engine compartment.
![[IMAGE]](http://www.darrylsgarage.com/914/914-20-83.jpg)
Update 2/19/22 - Rear shocks and wheel bearings installed - I was making great progress on reassembling the rear suspension, getting the rear shocks and wheel bearings installed today. Then I blew out a seal on the 12-ton bottle jack on my shop press trying to harvest the wheel lug studs from the sketchy drilled 4-lug conversion wheel hub to install them into a proper 5-lug hub. On the bright side, it's an excuse to get a bigger shop press.
![[IMAGE]](http://www.darrylsgarage.com/914/914-20-82.jpg)
Update 2/16/22 - Rear brake and suspension components painted - Last week's dust-free vapor honing was followed-up with this week's overspray-free painting. I set up a disposable paint booth using the box from the vapor honing cabinet and a dust collection fan used for sheetrock work. Inexpensive furnace filters were placed between a round hole cut in the back of the box and the dust collection fan. All the suspension and brake parts are now painted with high temperature engine paint. The rear wheel bearing retainers were extremely rust pitted so the pits were filled with JB Weld and sanded flush before getting the Eastwood's Golden Cad System paint. Now everything on my 914 project's suspension is ready for reassembly and getting those back wheels on the ground again.
![[IMAGE]](http://www.darrylsgarage.com/914/914-20-76.jpg)
![[IMAGE]](http://www.darrylsgarage.com/914/914-20-77.jpg)
![[IMAGE]](http://www.darrylsgarage.com/914/914-20-78.jpg)
![[IMAGE]](http://www.darrylsgarage.com/914/914-20-79.jpg)
![[IMAGE]](http://www.darrylsgarage.com/914/914-20-80.jpg)
![[IMAGE]](http://www.darrylsgarage.com/914/914-20-81.jpg)
Update 2/13/22 - Brake rotor backing plates repaired - The rear retaining bolt holes on both rear brake rotor backing plates were damaged, one completely torn off the other cracking. A little fabrication with a scrap of 20-gauge sheet metal and some MIG welds took care of the problem and now I'm ready to paint all the rear suspension components. One step closer to having those rear wheels back on the ground!
![[IMAGE]](http://www.darrylsgarage.com/914/914-20-75.png)
Update 2/12/22 - Testing what magnesium looks like vapor honed - I wanted to see what magnesium will look like vapor honed so I did half of the front piece of the fan shroud. I'm delighted, it looks like I spray painted it with satin finish silver paint! The engine is going to look spectacular with fresh powder coated tins and vapor honed engine case and fan shroud!
![[IMAGE]](http://www.darrylsgarage.com/914/914-20-74.jpg)
Update 2/11/22 - Rear suspension parts vapor honed - The vapor honing cabinet I ordered back on November 17 finally arrived on Monday and I was able to proceed on getting all the parts that will get the back wheels on the ground blasted and ready for paint. I had found a set of clean rear shock assemblies years ago with the thicker 11 mm thick springs to increase the load rate to 100 pounds and replacing the skinny 8.5 mm thick / 80 pound load rate ones that originally came on my entry-level 1.8 model. Everything on the shocks came apart easily and it wasn't long before I had my new Vapor Honing Technology model VH800P B Open Loop cabinet all plumbed, filled with 80-grit glass beads, water and dialed-in. It's amazingly quiet, clean and fast and before long all the parts were looking like new with a beautiful sheen. I'm really looking forward to seeing how magnesium parts like the fan blower housing look after it's done with it. Now a little welding on one of my disc rotor backing plates to fix the tab where the mounting bolt ripped off and painting everything with the high temperature engine enamel in the proper colors.
![[IMAGE]](http://www.darrylsgarage.com/914/914-20-71.jpg)
![[IMAGE]](http://www.darrylsgarage.com/914/914-20-72.jpg)
![[IMAGE]](http://www.darrylsgarage.com/914/914-20-73.jpg)
Update 2/4/22 - I've been invited to write another series of magazine articles in Spiel - Another pandemic winter, another series of restoration articles for my local Porsche Club of America region's monthly magazine. The Concours Chairman Dennis Rood has invited me to do another series of articles similar to the 7 I wrote last year about my 1964 Porsche 356C restoration. I think they'll be spread out over several months since this is a running project and I'm at least 3 to 4 months out waiting for the engine to return from Jack Morris. The first was received with lots of great feedback so please feel free to check it out by clicking on the following link:
![[IMAGE]](http://www.darrylsgarage.com/Jan2022Spiel.jpg) Link to January 2022 Spiel Article
Link to January 2022 Spiel Article
Update 1/27/22 - Restoration complete from engine mount pods to rear bumper - After making a few touch-ups with a paint brush where my paint gun didn't quite reach due to the angles, the underside up to the bridge jack is officially done. All the work prepping under the wheel wells all the way to the back side of the B-pillars kind of explains why I looked like a coal miner from getting up in there with solvents, scrub brushes and wire wheels to strip the paint. The new rear sway bar mounts are visible too.
![[IMAGE]](http://www.darrylsgarage.com/914/914-20-66.jpg)
![[IMAGE]](http://www.darrylsgarage.com/914/914-20-67.jpg)
![[IMAGE]](http://www.darrylsgarage.com/914/914-20-68.jpg)
![[IMAGE]](http://www.darrylsgarage.com/914/914-20-69.jpg)
Update 1/25/22 - Masking removed from the suspension - The pay-off to all that precision masking I did. It took longer to mask off the rear suspension than it did to paint. The small amount of all my work that will be visible from outside the car looks like brand new and the paint matches perfectly. Now I can install the new rear wheel bearings, new 5-bolt rear hubs and new Bilstein rear shocks to get the wheels back on the ground and off the bridge jack. I also have the new little plastic caps that plug the tops of the 3 rear suspension bracket captive nuts on each side. I'm feeling pretty stoked about how all my labor turned out and it's still only January.
![[IMAGE]](http://www.darrylsgarage.com/914/914-20-65.jpg)
Update 1/24/22 - Rear wheel wells and area under rear trunk painted Sunrise Red - I've finally finished with all the prep work and painting the rear suspension so it's time to paint the Mazda Sunrise Red to match the color I painted the outside of the car 30 years ago with Sikens acrylic polyurethane. My buddy, who has requested to remain anonymous and works as a painter in a collision body shop, set me up with a gallon of the perfect color match, low VOC automotive enamel from PPG. Yesterday I took my paint gun over to him so he could determine the amount of reducer for the precise viscosity to flow perfectly so he could run it through a strainer to make it ready to spray in a plastic gallon bottle. He prepared a half gallon of paint for me plus reducer, I had a little over a half gallon of paint to do the job and when finished had a about another paint gun's worth of paint leftover. My buddy says to just dump the remaining paint since once it's thinned, it has a short shelf life. All I know is it laid down so easily and looks like a perfect match, today was a very good day to have this all wrapped up. Now to get the rear wheels back on the car and off the bridge jack, I can then focus on the area ahead of the engine mount pods (which is where the bridge jack is lifting the rear of the car currently) and the front bulkhead which is easy to access and will not take long to prep for paint.
![[IMAGE]](http://www.darrylsgarage.com/914/914-20-61.jpg)
![[IMAGE]](http://www.darrylsgarage.com/914/914-20-62.jpg)
![[IMAGE]](http://www.darrylsgarage.com/914/914-20-63.jpg)
![[IMAGE]](http://www.darrylsgarage.com/914/914-20-64.jpg)
Update 1/22/22 - Rear suspension painted with semi-gloss black engine enamel - The shop has been staying at a nice warm 70 degrees so I decided to let the SEM Self-Etching Primer cure for nearly 48 hours. Today's work began by scuffing everything covered with the primer using a 320-grit Scotchbrite pad and then wiping it all down with wax/degreaser solvent and a lint-free towel. Masking off around the rear suspension components took most of the time, then two light and one heavy coat with 10 minutes of flash time between coats of Dupli-Color Ford Semi-Gloss Black Engine Enamel which contains ceramic resins for maximum heat dissipation and gloss retention. The resins are rated to up to 500 degree protection from exposure to excessive heat and automotive fluids. Now I can just forget about removing the masking tape for 2 days until it's cured enough to mask the fresh black paint so I can proceed with the Sunrise Red enamel over the body sheet metal areas that are already prepped and ready to paint.
![[IMAGE]](http://www.darrylsgarage.com/914/914-20-59.jpg)
![[IMAGE]](http://www.darrylsgarage.com/914/914-20-60.jpg)
Update 1/20/22 - SEM Self-Etching Primer sprayed - I finally degreased and sprayed the SEM Self-Etching Primer on the entire underside behind the engine compartment of the 914 today after applying the new seam sealing caulk yesterday. Tomorrow it's a light scuff everywhere with 320 grit Scotchbrite pad, degrease again and paint the suspension components semi-gloss black, let them cure a day before the spraying Sunrise Red enamel on the body. All that prep work is finally paying off.
![[IMAGE]](http://www.darrylsgarage.com/914/914-20-58.jpg)
Update 1/14/22 - Rear wheelwells stripped to bare metal - Over the last couple days I've prepared the rear wheelwells for painting by stripping the inner wheelhouse to bare metal and scrubbing the rest, which is covered by undercoating with mineral spirits and a scrub brush. A little more detail work and it will all be ready for priming with SEM Self Etching Primer.
![[IMAGE]](http://www.darrylsgarage.com/914/914-20-56.jpg)
![[IMAGE]](http://www.darrylsgarage.com/914/914-20-57.jpg)
Update 1/11/22 - Rear sway bar mounts welded in and everything ready to paint - MIG welding upside down is a bitch but I did a test run on the same thickness practice metal and know my MIG welder will make strong enough tack welds and then just connect the tack welds with beads spread out so the 14 gauge metal has a little more "meat" to further strengthen the weld. The result, welded upside-down, is some pretty ugly but very strong welds. I coined a new welding term, instead of "stack of dimes" MIG welding upside-down it's a "stack of stalactites"!. The test will be in whether they hold or not, I feel pretty confident they're good enough for the type of driving I do but wouldn't try autocrossing with them... never going to happen as long as I own the car. The big job was cleaning up the muffler heat shield so it was smooth enough to stick a heat barrier mat I ordered for it from Aase Porsche parts. The heat barrier mat should make a big difference in trunk heat with the Tangerine Racing EVO-IV muffler I have been using.
![[IMAGE]](http://www.darrylsgarage.com/914/914-20-44.jpg)
![[IMAGE]](http://www.darrylsgarage.com/914/914-20-45.jpg)
![[IMAGE]](http://www.darrylsgarage.com/914/914-20-46.jpg)
![[IMAGE]](http://www.darrylsgarage.com/914/914-20-47.jpg)
Update 1/7/22 - Dialing-in the MIG welder - I realized it had been over 10 years since I welded anything thicker than 20-gauge sheet metal since all I've done is rust repair bodywork. I ran down to my local hardware store and picked up a small sheet of 14-gauge and a section of 1/8" strap stock along with it. I photographed a side view of the the test metal strips next to a pencil in my bench vise showing the varying thickness to illistrate how easy burning through the body sheetmetal would be. I cut them down into test pieces and started experimenting with voltage and wire speed settings and quickly noticed how rusty my welding skills were due to failing eyesight so I also needed to practice a bit. Finally I figured out a high voltage with slow wire feed rate produced 4 perfect welds in a row so I called it good-to-go. Close-up photos show how nice and uniform the puddles looked on my last 4 tack welds and flipped-over how perfect the penetration was on the back side of the 14-gauge sheetmetal. The last thing I wanted to do was burn through the metal on the car and was confident that at least the initial welds would make great penetration at these settings. My experience with MIG welding upside down had prepared me for the tedious nature of molten weld puddles running down into the MIG welder's nozzle and the need for using lots of welder tip dip (jelly) and constant disassembly and cleaning, not to mention running down my arm or into the palm of my welding glove. I also ran to my welding supply store to pick up 4 new nozzles and 10 new tips in preparation for how quickly they can get damaged welding upside-down.
![[IMAGE]](http://www.darrylsgarage.com/914/914-20-70.jpg)
![[IMAGE]](http://www.darrylsgarage.com/914/914-20-52.jpg)
![[IMAGE]](http://www.darrylsgarage.com/914/914-20-53.jpg)
![[IMAGE]](http://www.darrylsgarage.com/914/914-20-54.jpg)
![[IMAGE]](http://www.darrylsgarage.com/914/914-20-55.jpg)
Update 1/5/22 - Rear sway bar mounts are ready for welding - After careful consideration I've decided to both bolt and weld the new sway bar mounts in. The forward edge of the 1/8" thick mount welds to 14 gauge sheet metal of the transmission mount crossmember so welding is a no-brainer. The back section welds to 20 gauge sheet metal that requires welding a reinforcement plate inside the trunk. I think simply drilling for an M8 bolt with a big fender washer provides as much support without messing up my nicely painted trunk so that's the way I'm going. I carefully measured the exact center point of the rear tab on the sway bar mounts and drilled holes as close to 8 mm as I could so they fit without any play. Then I carefully measured and marked the center and cross lines of the hole in the transmission mount crossmember where the forward captive nut on the sway bar mount fits inside. After carefully lining-up the centerline of the sway bar mount to the centerline of the crossmember, I marked the holes for the rear mounting bolts on the body and drilled the same 8 mm drill. The beauty is the rear mounting bolt secures the sway bar mount tightly in place for welding and I marked where the welds will go with a yellow paint marker. After removing the sway bar mount, I used my spot sandblaster to remove the surface rust on the face of the crossmember to prep it for welding. Mounting the sway bar mount for welding was done after checking and double-checking they're parallel to the transaxle mount holes from side to side. Now when I'm feeling in the mood to weld, which usually has to do with how stiff my neck is from all this looking up work under the car, I'll dial in my MIG welder for perfect penetration on some test pieces 1/8" thick to 14-gauge sheet metal.
![[IMAGE]](http://www.darrylsgarage.com/914/914-20-48.jpg)
![[IMAGE]](http://www.darrylsgarage.com/914/914-20-49.jpg)
![[IMAGE]](http://www.darrylsgarage.com/914/914-20-50.jpg)
![[IMAGE]](http://www.darrylsgarage.com/914/914-20-51.jpg)
Update 12/23/21 - Grease and undercoat removed from underside of rear trunk - Over the last couple days I've tented-off the underside of the rear trunk and placed a big tarp on the floor of the shop to catch the debris generated by pressure washing with 3 gallons of mineral spirits applied using a phenumatic siphon spray wand. A soft-bristle brush was used to remove the caked-on grease and dirt and once the undercoat was exposed, saturation with the mineral spirits made it become brittle and easy to scrape off with a putty knife and wire brush leaving the exposed original blue paint. Since the whole area was covered with CV joint grease from failed boots over the years, there was very little surface rust to contend with. Now I can evaluate the best way to proceed with the new rear sway bar mounting points, my initial impression is that welding alone to the eroded trunk floor sheetmetal will probably not be enough and the option of a thru bolt might be necessary in addition to welding to the transmission mount crossmember. The last thing I want to do is have the mount tear loose from its welds and will sacrifice originality for functionality.
![[IMAGE]](http://www.darrylsgarage.com/914/914-20-37.jpg)
![[IMAGE]](http://www.darrylsgarage.com/914/914-20-38.jpg)
![[IMAGE]](http://www.darrylsgarage.com/914/914-20-39.jpg)
Update 12/23/21 - Area between rear suspension mounts and engine mount pods stripped to bare metal - I got a bit sidetracked by focusing on stripping the parts of the rear suspension mounts I'll actually be able to see from outside the car. I also decided to go ahead and strip the difficult to access spaces between suspension mounts and the backs of the engine mount pods. Now everything is ready for etching primer once I get done with the area above the transaxle and rear sway bar mounts. Not long before I'll have the tires back on the ground now.
![[IMAGE]](http://www.darrylsgarage.com/914/914-20-40.jpg)
![[IMAGE]](http://www.darrylsgarage.com/914/914-20-41.jpg)
![[IMAGE]](http://www.darrylsgarage.com/914/914-20-42.jpg)
![[IMAGE]](http://www.darrylsgarage.com/914/914-20-43.jpg)
Update 12/16/21 - Both sides suspension are finally bare metal - It's like deja-vu in mirror image but with the experience and new electric drill used on the left side, the right side went much faster. I'm really pleased with now everything has cleaned up and it will look stunning with fresh paint and a coat of Sunrise Red enamel. I've done everything I could reach up to the the front engine mount pods, where the bridge jack is lifting the car. Now it's time to work on the crossmember that holds the rear transaxle mount pods and prepare it for welding in the new mounts for the used factory sway bar.
![[IMAGE]](http://www.darrylsgarage.com/914/914-20-35.jpg)
![[IMAGE]](http://www.darrylsgarage.com/914/914-20-36.jpg)
Update 12/9/21 - Left side suspension is finally bare metal - The finishing touches with stainless steel wire brush wheels on my Dremmel tool took care of any remaining surface rust so it's time to move on to the right side. Now that I have the tools and techniques figured out and the entire swing arm is exposed with no caliper or rotor to work around, stripping the paint and wire brushing should go much faster. I'm really starting to feel like I'm making progress now and will be welding on sway bar mounts and spraying Wurth Stone Guard and High Build Underseal before I know it.
![[IMAGE]](http://www.darrylsgarage.com/914/914-20-33.jpg)
![[IMAGE]](http://www.darrylsgarage.com/914/914-20-34.jpg)
Update 12/8/21 - Factory sway bars front and rear are here and progress slowly continues - A used set of factory front and rear sway bars as well as all the parts required to weld-in mounting brackets and install them with new gold cadmium plated parts and fresh rubber bushings have arrived. Work in the "coal mine" is getting close on the left rear sway arm/suspension console as I'm down to the Dremmel-size wire brushing to remove surface rust. I also have the place that never sees the light of day, the "cavern" for the top strut/spring mount all wire brushed out and the surface rust sealed and ready for a coat of Sunrise Red enamel over what was left bare metal from the factory. Overall, I'm very pleased to find minimal surface rust under the heavy sealing caulk covering the lap welded panel seams.
![[IMAGE]](http://www.darrylsgarage.com/914/914-20-30.jpg)
![[IMAGE]](http://www.darrylsgarage.com/914/914-20-31.jpg)
![[IMAGE]](http://www.darrylsgarage.com/914/914-20-32.jpg)
Update 11/29/21 - Pack up the parts and get back to work - Once I knew I had all the parts to make the car a roller again, I organized and stored the parts back in the '61 VW panel van and got to work. After removing the brakes from the rear swing arms, I used my 5 pound slide hammer to remove the wheel hubs, which went really easily using lug nuts to secure the puller flange. Then it was time to use my new bearing puller set I purchased from Pelican Parts which easily pulled the bearings out of the housing with no effort other than securing the back side of the puller with a 1-1/2" socket on a breaker bar. Then I had a little bit of a freak out when the left swing arm developed a significant amount of play and made lots of noise. Once I processed the situation, I simply retorqued the inner left strut shaft nut and everything snugged back up nice and tight. I can only assume that between the heat from friction using the wire brush on my drill on it and then the shock from the 5 pound slide hammer, the nut backed off ever so slightly. There is no movement one would see with worn out bushings and I'm determined to keep using them in an attempt to avoid messing up the rear wheel alignment. Now everything is stripped off the rear swing arms and they're ready for some aggressive paint stripping, wire wheel cleaning and sanding in preparation for painting.
![[IMAGE]](http://www.darrylsgarage.com/914/914-20-24.jpg)
![[IMAGE]](http://www.darrylsgarage.com/914/914-20-25.jpg)
![[IMAGE]](http://www.darrylsgarage.com/914/914-20-26.jpg)
![[IMAGE]](http://www.darrylsgarage.com/914/914-20-27.jpg)
![[IMAGE]](http://www.darrylsgarage.com/914/914-20-28.jpg)
![[IMAGE]](http://www.darrylsgarage.com/914/914-20-29.jpg)
Update 11/27/21 - All the parts are here, heads off to Walt - Things are moving right along on my winter project, the 1.8 to 2.0 liter conversion and mechanical refresh after 30 years of use on my first Porsche, the '74 914. Jack in Spokane quickly got to the bottom of the lack of throttle response, a dropped valve seat on cylinder #1 exhaust valve! Now the heads are off to wait their turn in the queue at Competition Engineering for Walt Watson to work his magic on them. Jack confirmed all engine case measurements are still within spec from my last rebuild so no expenditures required there other than a thorough cleaning and replacing the factory oil galley plugs with threaded ones.
![[IMAGE]](http://www.darrylsgarage.com/914/914-20-19.png)
![[IMAGE]](http://www.darrylsgarage.com/914/914-20-20.png)
The big milestone is successfully avoiding supply chain delays and long backorders by scouring the Internet for suppliers with the individual parts I need actually in stock. I now have all the parts required to put it all back togther once I get the long-block engine back from Jack. In normal times it seems I'm always held up by parts orders so I made parts procurement the critical path of this project. I'm amazed at the aftermarket support for the humble 914. The only expensive (as in 2-3x) Porsche branded parts not available from aftermarket sources are the new CV joints. No complaints about those CV joint's price though, as they're new production by Porsche Classic after decades of being listed as NLA.
![[IMAGE]](http://www.darrylsgarage.com/914/914-20-18.png)
Update 11/10/21 - Disassembly of the rear suspension underway - Once I got the front engine mounts removed, my bridge jack was positioned to use the mounting brackets as lifting points and provide a very secure platform for hammering out axle shafts and such. I've just about got the rear suspension stripped from the car and have decided that removal of the trailing arms isn't required. The pivot bushings of the trailing arms are still very tight with no play and removal of their mounting brackets would require a wheel alignment when reinstalled as well as risking removing bolts that have most likely never been out of the car so they're probably rusted tight so if it ain't broke, don't fix it! With the brakes, rear spindles and wheel bearings removed, I'll be able to rotate the trailing arms to their full travel and strip and repaint them so they look perfect without removing them. I did a little experimental paint stripping and wire brushing on the left inside and find they're very easy to get down to clean metal.
![[IMAGE]](http://www.darrylsgarage.com/914/914-20-21.jpg)
![[IMAGE]](http://www.darrylsgarage.com/914/914-20-23.jpg)
![[IMAGE]](http://www.darrylsgarage.com/914/914-20-22.jpg)
Update 10/19/21 - The 1.8 is off to be converted to 2.0 by Jack Morris in Spokane, Washington - Over the last weekend, my wife Thu and I packed up her 2019 Honda CR-V and made the 5 hour drive over to Spokane to drop the long block 1.8 engine (and tunnel-case transaxle for the Porsche-powered '56 Oval Window VW Beetle project) off with Jack and got to visit with him and his wonderful family. We also made it a "mini vacation" with a stay at Lake Coeur d'Alene, Idaho and enjoyed the fall colors while blessed with some beautiful weather. I have made great progress with completing the heat exchanger restoration by blasting, welding up a couple little cracks and painting the steel exhaust pipes by giving them a coat of extreme high temperature VHT "Flame Proof" exhaust header paint. While I was blasting, I degreased, blasted and painted a new engine crossmember since the old one was bent after an encounter with a speed bump. All the new parts and restored parts are tucked away safely in the '61 VW panel van for safe keeping until the engine returns from Jack in the spring. JB, Jack's son is now 12 years old and besides his amazing VW & Porsche mechanical skills, has become quite the musician and plays both the traditional base and electric base guitar. I was impressed with his ability to tie his own bow tie and what a sophisticate he's evolving into... damn musicians, they get all the girls!
![[IMAGE]](http://www.darrylsgarage.com/914/914-20-11.png)
![[IMAGE]](http://www.darrylsgarage.com/914/914-20-12.png)
![[IMAGE]](http://www.darrylsgarage.com/914/914-20-13.png)
![[IMAGE]](http://www.darrylsgarage.com/914/914-20-14.png)
![[IMAGE]](http://www.darrylsgarage.com/914/914-20-15.png)
![[IMAGE]](http://www.darrylsgarage.com/914/914-20-16.png)
![[IMAGE]](http://www.darrylsgarage.com/914/914-20-17.png)
Update 10/9/21 - Revisiting the 914 engine after 30 years - It's kind of remarkable, how much I still love this car after all these years. You never get over your first Porsche. Taking the advice of many 914 owners I've met over the years, it's the one car they always seem to regret selling so I took their advice and kept mine. I abandoned the L-Jetronic fuel injection on the 1.8 liter engine a few years back after keeping it alive for 25 years and installed Weber 40 IDF carbs using the Tangerine Racing cable throttle linkages and EVO IV muffler. I absolutely loved everything but the lack of throttle response due to the lack of a proper cam to take advantage of the Webers. I had also installed hydraulic lifters on the engine when I had it professionally built 30 years ago and they don't exactly help performance either. Now after a couple years of gutless performance, my buddy Jack Morris convinced me to have him build a 2.0 (1971 cc) engine out of that 1.8 by installing factory 2.0 crank, lightweight Carillo rods and cast iron 94 mm bore cylinders (stock displacement with thick cylinder walls, not 96 mm big bore with thin, warpage prone cylinder walls) and higher compression flat-top pistons. Most importantly built with a proper cam profile for dual carburetors and some head work on the 1.8 heads to help them breathe a little better. So over the last few weeks I've pulled the drivetrain, got the engine ready for a trip over to Spokane, the transaxle all blasted and cleaned, the heat exchangers all polished up and all the parts I want to replace when I reinstall the engine ordered and delivered while what I need is still fresh in my mind. I was amazed, all the parts I need were aftermarket and found on either partsgeek.com or 914rubber.com at a fraction of the cost of ordering from the usual Stoddard or Pelican sites. I also ordered a rebuilt Bosch alternator since there's no time like when the engine is out to replace that hard to get to component. I hope to get the engine long block delivered to Jack in the coming weeks so he has it over the winter and it will be ready to pick up in the spring.
![[IMAGE]](http://www.darrylsgarage.com/914/914-20-1.png)
![[IMAGE]](http://www.darrylsgarage.com/914/914-20-2.png)
![[IMAGE]](http://www.darrylsgarage.com/914/914-20-3.png)
![[IMAGE]](http://www.darrylsgarage.com/914/914-20-4.png)
![[IMAGE]](http://www.darrylsgarage.com/914/914-20-5.png)
![[IMAGE]](http://www.darrylsgarage.com/914/914-20-6.png)
![[IMAGE]](http://www.darrylsgarage.com/914/914-20-7.png)
![[IMAGE]](http://www.darrylsgarage.com/914/914-20-8.png)
![[IMAGE]](http://www.darrylsgarage.com/914/914-20-9.png)
![[IMAGE]](http://www.darrylsgarage.com/914/914-20-10.png)
STEP-BY-STEP BLOG: For the granular step-by-step process of removing the engine from the car, I've created a Facebook Photo Album. Click on the 914 image below to access a link to a Facebook album containing all the details of the work performed.
Update 2/17/2017 - The decision to abandon the factory fuel injection - Over the 25+ years I've owned this car, the L-Jetronic fuel injection system performed flawlessly for the first 20 or so years, then it started becoming problematic to keep on the road with nearly impossible to find repair parts and long waits to have components rebuilt by hard to find specialists working in the shadowy aftermarket. Finally, enough was enough, I removed and boxed-up the factory fuel injection system and I did a proper Weber 40 IDF carburetor conversion using the CB Performance Spanish-made carburetors on their proprietary intake manifolds. Rather than using the kludgy and difficult to adjust throttle linkage bar, I stepped up to a cable-driven carburetor linkage from Tangerine Racing that I'd highly recommend to anybody considering the same conversion. Black carburetor rain hats from 914 Rubber fitted over the standard CB Performance air cleaners, allowed for removal of the rain tray and prevent water from being sucked into the intakes when driving in the rain (which is highly unlikely while I own the car). I also added a stainless steel muffler from Tangerine Racing and TIG welded oxygen sensor bungs to each end for dialing in the jetting using my dual sensor wide-band digital air/fuel meter. The cockpit was upgraded with a black Momo Prototypo steering wheel and leather horn button by Car Bone Liveries. I really love the sound of the carburetors when I drive with the top off, the throaty growl of the 1-3/4" velocity stacks are as satisfying to my ears as much as the added low-range torque is to my right foot. My first Porsche still makes my heart go pitter-pat when I look at it sitting in my showroom and when I take it out and drive it, the one that I didn't sell is still making me happy I kept it!
![[IMAGE]](http://www.darrylsgarage.com/914/914-2021e.png)
![[IMAGE]](http://www.darrylsgarage.com/914/914-2021a.jpg)
![[IMAGE]](http://www.darrylsgarage.com/914/914-2021b.jpg)
![[IMAGE]](http://www.darrylsgarage.com/914/914-2021c.jpg)
![[IMAGE]](http://www.darrylsgarage.com/914/914-2021d.jpg)
Back in the beginning, 1991 - You are probably thinking, given the price of new parts is the same as a 911, why in the hell would anybody do a bare metal color change paint job and extentsive rust repair to restore a 914 Porsche way back in 1991? The so called, "Poor man's Porsche" with its boxy shape and pop-off top had me even before I could drive, building 1/25th scale models of them at age 14 back in 1973. Now those same vintage Revell model kits come up on eBay occasionally for bidding, usually getting about $50 for kits that originally cost $4.95!
![[IMAGE]](http://www.darrylsgarage.com/914/revell.jpg)
![[IMAGE]](http://www.darrylsgarage.com/914/race914.jpg)
The 914's story is full of irony, the best selling Porsche automobile of its era and keeping the company afloat during a time when new, strict US emissions standards were killing the reliability and sales of the only other model, the 911. The 914 was the bastard child of the Porsche automotive family and curiously omitted from Porsche automobile marketing propaganda except for the occasional 914-6. As a member of the generation of new drivers from the mid-1970's, and a die-hard Volkswagen enthusiast, I always thought of the mid-engine 914 as the ultimate air-cooled Volkswagen, combining the fully evolved, pre-emission control Volkswagen type-4 pancake 4-cylinder engine with race proven drivetrain and suspension components of the ultimate Porsche, the 911. I remember stopping and checking out every 914 I encountered while I was a starving student and in those struggling years getting my career off the ground. It was like a kind of unfinished business I filed away until my finances would allow it.
![[IMAGE]](http://www.darrylsgarage.com/914/914-pnwr.jpg)
![[IMAGE]](http://www.darrylsgarage.com/914/914plaq.jpg)
In the summer of 2009, and over 15 years since I restored it and the only time ever, I entered my 914 in a car show. The show was the 2009 Pacific NW Region of the Porsche Club of America's annual summer show & shine and my 914 won 1st place! It just goes to show how even the purists have a soft spot for the 914.
![[IMAGE]](http://www.darrylsgarage.com/914/914black.jpg)
In 1991 I found my project car in running condition for $2,100 but with so much body flex the passenger door would touch the B-pillar on hard cornering. Prices for OEM parts, while the same price as 911 parts were not as expensive as they are now so I slowly started acquiring all NOS trim and weatherstripping bits and pieces for the restoration as rapidly as our family budget would allow. Local junkyards also had lots of derelict 914s and treated them like Volkswagens so I could pull my own parts at classic, now long gone Seattle area junkyards like Bry's in West Seattle, Fitz' in Woodinville and Campbell Nelson in Edmonds. This car's factory color was "Marathon Blue Metallic" (paint code L-96-M) that had been repainted black by a previous owner. Like most 20+ year old cars in the Pacific Northwest this car had some extreme rust in the rocker panels and under the battery but it had never been wrecked. Unfortunately the extent of the rust didn't really reveal itself until I removed the outer rocker panel covers and had the car media blasted, only then it was evident it should have been condemned. Do the prudent thing and haul it to the junkyard? Not me, no, since they're critical to the structural integrity of the car (there's no roof) I had the inner and outer rocker panels (the uni-body channels under both doors shown in red in the diagram below) professionally replaced by a competent bodyshop with a frame bench using new sheetmetal pressings from Automobile Atlanta on both sides ($$$ KA-CHING $$$) and then further reinforced. This was during a time in my software engineering career where "outsourcing my hobby" and watching somebody else do the fun work was as much time as I could afford, but I made it a goal that someday, I would be doing the welding and fabrication on my restorations projects and kept my nose to the grindstone until that day.
![[IMAGE]](http://www.darrylsgarage.com/914/914fix.jpg)
While it was at the bodyshop, I also had the sheet metal under the battery and right rear suspension console (commonly referred to as "the 914 hell hole") replaced with new panels to fix all traces of rust due to battery acid corrosion and rain water pooling. It is now better than new and very rigid in tight cornering. After media blasting and bringing all the surfaces back up from bare metal, I wanted a red that closely matched the factory color Phoenix Red (paint code L32K) searching in Sikkens paint sample books. Working with the body shop owner Dick Junkin, we arrived at Mazda Miata Sunrise Red (paint code RH) for the new color, using the super durable Sikens acrylic polyurethane enamel paint system, which has held-up wonderfully since it was painted in 1993.
![[IMAGE]](http://www.darrylsgarage.com/914/914colors.jpg)
![[IMAGE]](http://www.darrylsgarage.com/914/mazdared.jpg)
Years later I added the targa bar vinyl trim and the "PORSCHE" racing stripe as was a factory option on the 1974 version. The advent of eBay has made many new 914 parts and accessories available to me, like the complete 8 volume set of factory manuals, slightly used, at 20% of the price of new. I also had the brake rotors machined to accept the 911 style 5-bolt 15" Fuchs alloy wheels like the factory 6-cylinder powered 914-6 had back in 1970. I upgraded to a 911, 19mm master cylinder and stainless steel brake hoses to improve brake system pedal response. The Spartan racecar style interior includes a MOMO steering wheel, additional VDO gauges in the console and Blaupunkt in-dash CD player.
![[IMAGE]](http://www.darrylsgarage.com/914/914int.jpg)
I wanted the car to be a long-term dependable driver so I decided to buy a 1.8 liter powered 914 rather than the 2.0 because of the cost savings to keep it on the road and I guess since I've been running this engine since 1993, all trouble-free years since the rebuild, I achieved that goal. I also wanted to build the perfect city cruiser, not a racer. If I wanted to go fast, I'd get the white-knuckles and shakes with with 911s! Personally, I think rebuilding fuel-injected 914 2-liter engines is a total waste of money for a marginal increase in performance in city type driving because you really don't see the extra horsepower kick in until you get to about 50 MPH. At the time of my engine rebuild, a set of rebuilt 2.0 liter heads with their exotic sodium-filled exhaust valve stems cost as much as the entire engine rebuild on the 1.8 and they have become more expensive as time goes on!!! This is due to the fact the 1.8 is the same engine as used in all those VW vans of that era and the parts are very plentiful. The 2.0 liter, 4-cylinder engine is a special Porsche one-off that is nearly impossible to find parts, especially for the fuel injection system, and if found they are insanely priced.
![[IMAGE]](http://www.darrylsgarage.com/914/914spec.jpg)
The current 1.8 engine is relatively stock, rebuilt using all new Bosch L-Jetronic fuel injection components, with the one exception of adding a stock-grind aftermarket cam and hydraulic lifters manufactured by Web Cam to alleviate the need to adjust the valves every 6000 miles. The engine and transmission have been rebuilt to factory tolerances and it runs, shifts and drives like new. A couple modifications that have greatly improved the performance of the starter is a high cold-cranking amp gel cell battery (mounted on its side in the stock location) and a starter circuit bypass relay that minimizes the distance the electricity has to travel from the battery to the starter to start the car. A great benefit of the gel cell battery is the fact there is no battery acid to spill out to again damage the rear suspension console that I had replaced.
![[IMAGE]](http://www.darrylsgarage.com/914/gelcell.jpg)
My most recent enhancements to the car were made in the summer of 2005. I replaced the flimsy reproduction fiberglass front spoiler and rear apron I had been making due with, with factory originals. I found some really nice original steel ones which I straightened, welded-up the cracks, blasted and painted after coating them with Wurth Stone Guard. I also replaced the 4-pipe Monza muffler with a single outlet Bursch extractor system which utilized the stock muffler opening on the rear apron. Now all the black ground-level panels on the 914 are steel and have matching finishes. I rather like how it turned out and the additional power I get with the new exhaust system, especially in the 4000 an above RPM range, it is really noticeable. I had been running smaller rear bumperettes on the front bumper for years until I found a NOS set of the correct, longer front ones on eBay for a reasonable price. The bumperettes on the front are about 30mm longer than the back ones.
![[IMAGE]](http://www.darrylsgarage.com/914/914-frt.jpg)
![[IMAGE]](http://www.darrylsgarage.com/914/914-rear.jpg)
Like most 40-year-old cars it requires constant tweaking to keep it purring, that's why it's a hobby and not just transportation. All the interior sheetmetal, front and rear trunks, engine compartment and interior have been detailed and painted to match the exterior color so the red color looks like a factory paint job.
![[IMAGE]](http://www.darrylsgarage.com/914/914trnk.jpg)
The original factory appearance group console instruments have been upgraded with modern VDO Cockpit style gauges. New gauges with numerical readings include an oil temperature gauge, oil pressure, alternator output voltage and clock. I have the working original gauges safely stored away in the event I would ever want to revert back to stock but I would have a hard time adjusting to the loss of the oil pressure gauge.
![[IMAGE]](http://www.darrylsgarage.com/914/914dash.jpg)
![[IMAGE]](http://www.darrylsgarage.com/914/914dot.jpg)
One of the things I really like about my 914 is the hard fiberglass targa top which stows in the trunk. I used to own a 911SC Targa with a soft, folding targa top and I always worried about somebody using a knife to cut through the padded vinyl top to break into the car. Not so much that they broke into the car but that I had to replace the expensive upholstered top! I've always thought the way the 914 top stowed in the trunk and still allowed for luggage space was a marvel of German engineering genius!
![[IMAGE]](http://www.darrylsgarage.com/914/914trnk.gif)
I'm the first to admit, the mass-produced Karmann-built body doesn't have anywhere near the fit and finish of a Zuffenhausen hand-built 911, regardless it is an absolute thrill to drive with the top off on warm summer days at a brisk speed on country roads with twisty, tight curves.
Porsche purists scoff at its Volkswagen lineage but one thing is for certain, it has Porsche blood, sharing subsystems, such as the transmission, front suspension and numerous parts with the 911. Like breeding a thoroughbred mare with a donkey to create the ultimate "mule" sports car for the common people, hence the dubious nickname given to it by the Germans, "VoPo" for "Volks-Porsche" (not to be confused with "Volks-Police" as in those infamous trigger happy East German border guards)!!! Can you see the same mid-engine drive train layout of 914 of the 1970's in the Boxster of the 1990's? Porsche has had a long standing tradition of mid-engined roadsters as far back as the 1950's, remember the 550 Spyder (the car that "the Rebel" James Dean died in)?
![[IMAGE]](http://www.darrylsgarage.com/914/jdean.jpg)
Porsche also has a long standing mid-engine motorsports heritage, here is the 1970 24-hour Le Mans winning and mid-engined 917 parked next to a stock 1970 914-6. A race version of the 914-6 was the Le Mans GT class winner in 1970, even beating all the 911's in the GT class!!! There was even a "victory poster" (see below) featuring the 914-6 as the Le Mans winner! Volkswagen + Porsche + Audi worked really hard in the early 70's to sell the image of the Volkswagen / Porsche 914 as being as valid of Porsche as the ones costing $100K plus. I can't help but think that the 914-6 winning the GT under 2000cc class at the 1970 Le Mans was a source of great embarrassment for Porsche's Zuffenhausen engineers to have a 911S beat by a car with a smaller engine!
![[IMAGE]](http://www.darrylsgarage.com/914/917n914.jpg)
![[IMAGE]](http://www.darrylsgarage.com/914/70lemans.jpg)
As a kid, the mystic of the Porsche as a racing machine was enhanced by advertisements like the one below, a 2-page spread showing the 1974 product line for varying budgets. To my 15-year-old mind, this was confirmation in writing that the 914 was a legitimate member of the Porsche racing stable! Now I look back and laugh at my own "wonder years" when a $6050 mass-produced car was so much more than just a fleeting Madison Avenue image.
![[IMAGE]](http://www.darrylsgarage.com/914/914ad.jpg)
Here's a series of ads describing the 914 as "The ______ Porsche" showing how twin trunks, a removable top and great gas mileage made for an exciting and versatile transportation option, not just another import sports car. I'm banking on the nostalgia factor someday making the value of my 914 rise as most hard-core Porsche owners I've shown the car comment that they once owned a 914 and regret ever letting go of it. For many, including myself, the 914 was the beginning of a life-long love affair with Porsches.
![[IMAGE]](http://www.darrylsgarage.com/914/the914ads.jpg)
Truth in advertising? This ad features a 914 in the "Marathon Blue Metallic" (paint code L-96-M)mine was originally painted before the prior owner covered it in black.
![[IMAGE]](http://www.darrylsgarage.com/914/therustone.jpg)
Here are my favorite Porsche related links:
 914 World Technical Bulletin Board
An interesting collection of vintage 914-6 racing photos by Armando Serrano
The Official Porsche USA Home Page
914 Rubber - The source for NLA rubber parts
Tangerine Racing - The source for 914 restomod parts
PMB Performance - The source for 914 brake caliper rebuilding
Pelican Parts Porsche 914 Technical Web Site (this site is amazing)
The Pelican Parts Technical Bulletin Board
914 Werke - A few great restomod parts here too
Automobile Atlanta - Home of Dr. 914, George Hussey
High Performance House - The 914 online junkyard with the best used parts
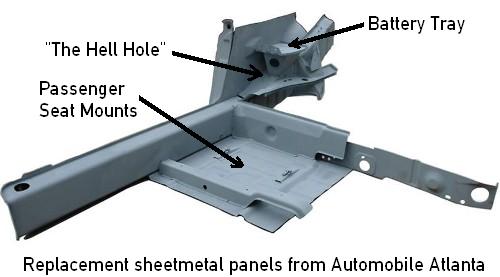
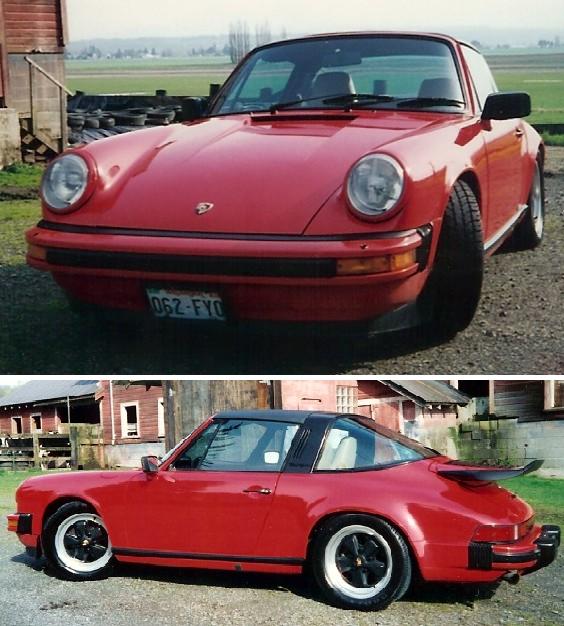